Quantcast
Channel: Elfshot
Viewing all 437 articles
Browse latest View live

Knapping with future lithic analyists

$
0
0
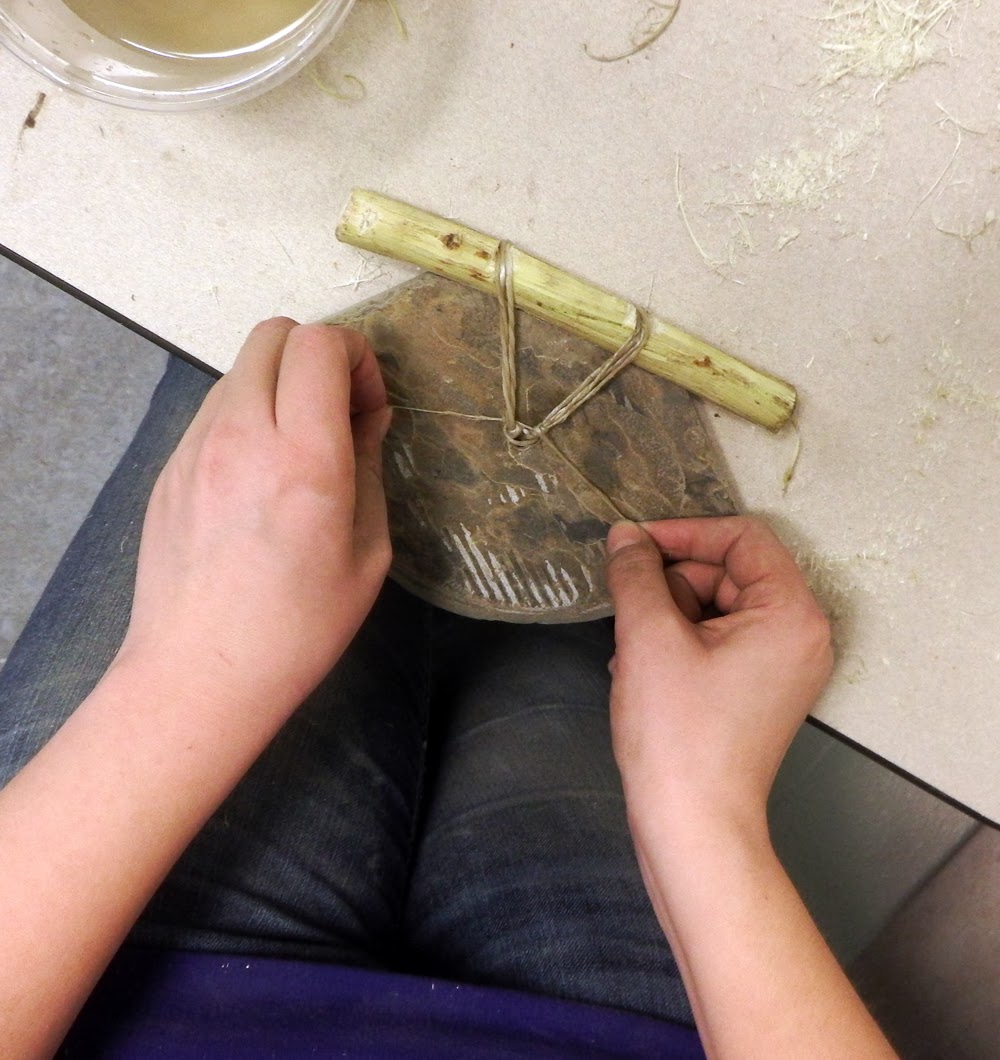
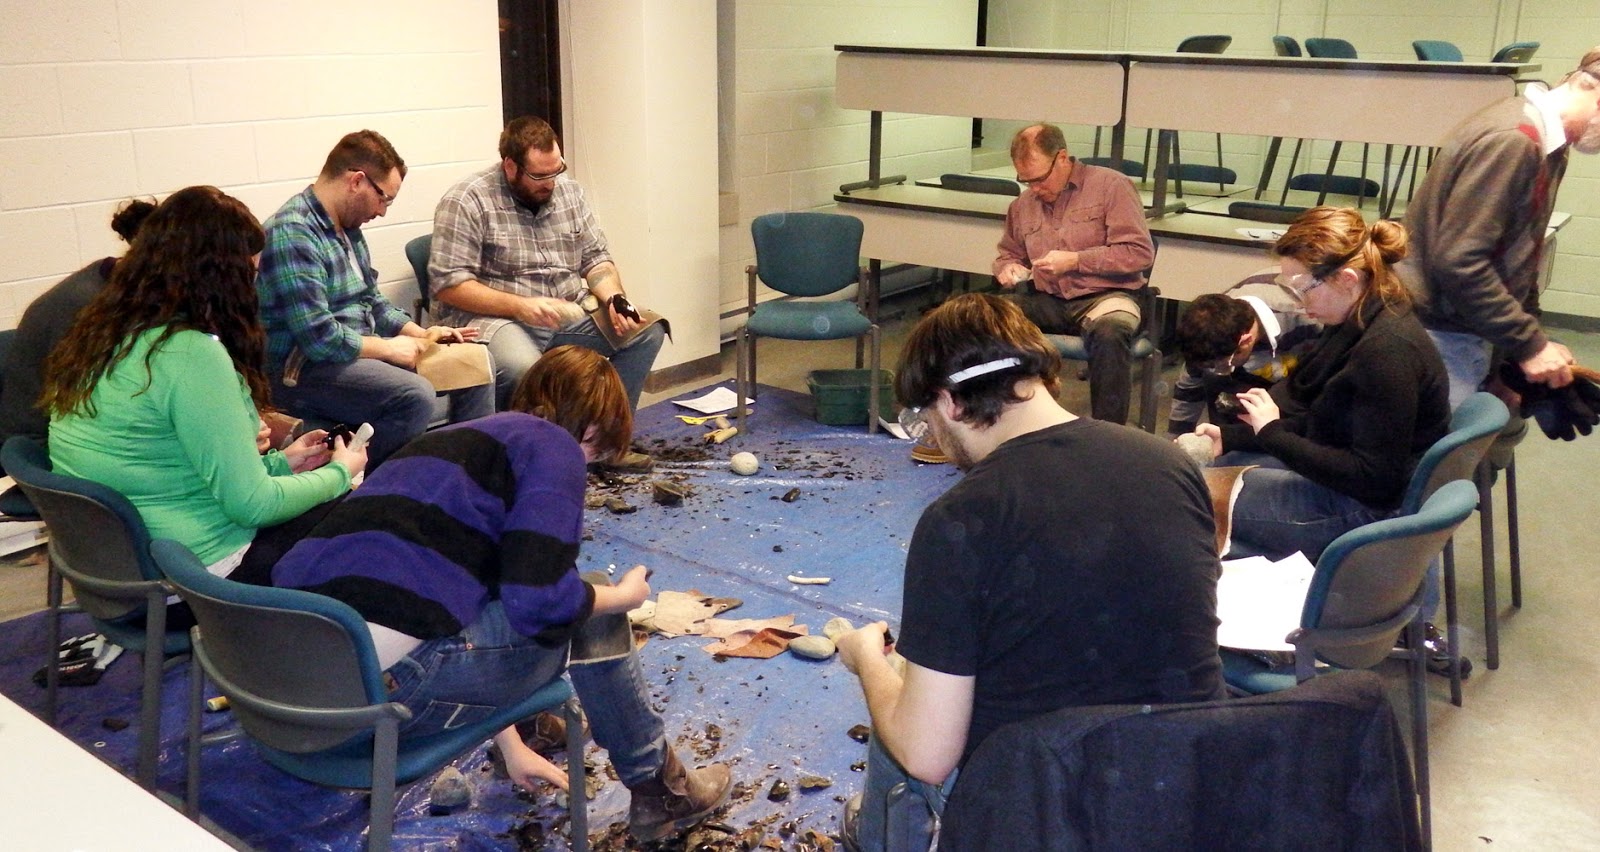
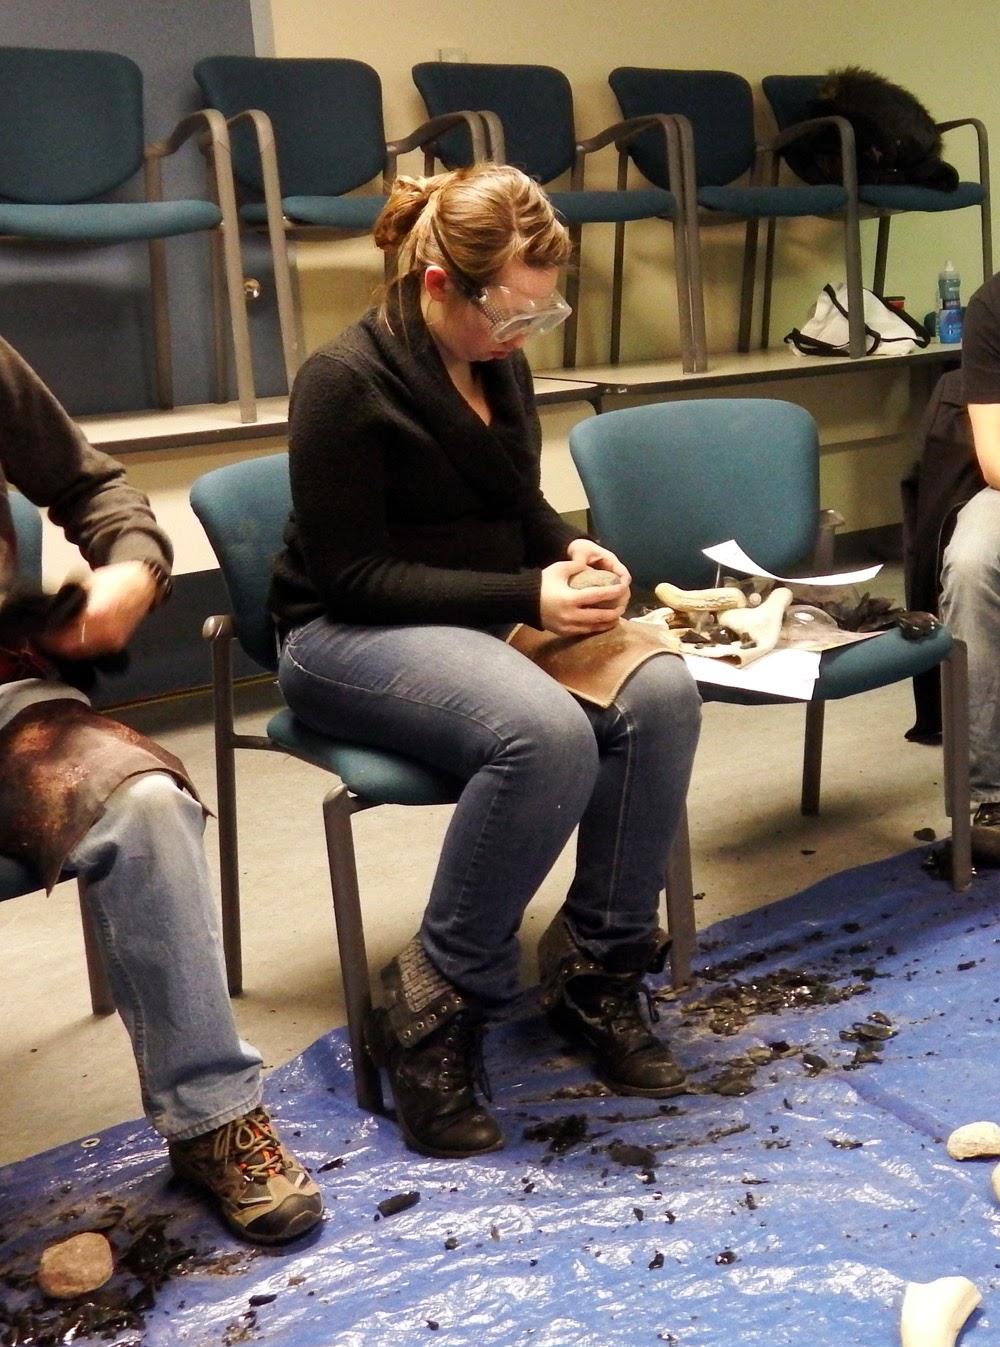
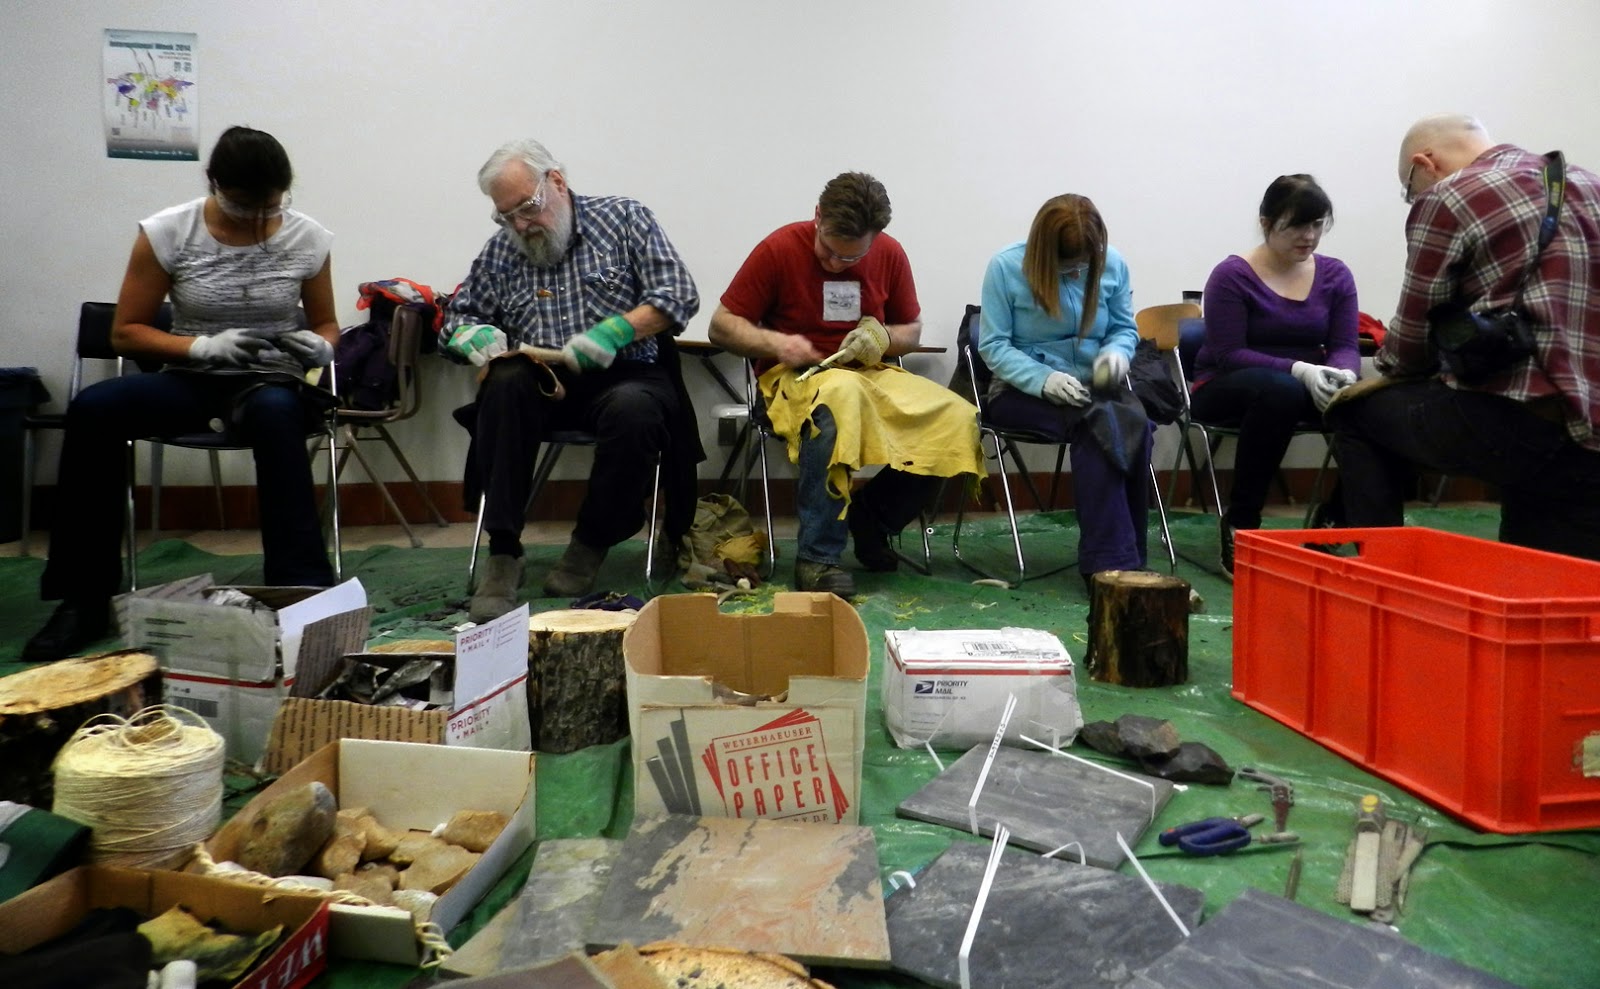
I had a good day with archaeology students at Memorial University of Newfoundland today.  I spent the morning with Catherine Jalbert's lithic analysis class and ended the day with a student mixer where I was helping represent the Newfoundland and Labrador Archaeological Society.  During the morning class, we covered percussion knapping and we will be continuing with pressure flaking next week.

For MUN students who are interested in knapping it looks like MUNArch will be offering the flintknapping workshops again this semester.  We're finalizing the dates and topics, but it should happen late February/early March. Stay tuned for details.


Photo Credits:
1-2: Tim Rast
2-4: Catherine Jalbert

Snowshoeing Father Troy's Trail

$
0
0
We had another perfect Saturday morning for hitting the trails on snowshoes this past weekend.  This time we tackled a section of Father Troy's Trail on the East Cost Trail between Torbay and Flatrock.  These scenic tromps with friends are quickly becoming the highlight of the winter.  We covered a third or so of the trail, and there are lots of mid-trail access points along this particular stretch, so I'm hoping we can get back again in the coming weeks and see some more of it.


Photo Credits: Tim Rast and Lori White

Recording artifacts to reproduce them

$
0
0
A quartzite projectile point
I'm starting work soon on a set of hafted reproductions based on artifacts from an Intermediate Period site in Sheshatshiu, Labrador.  The site is being investigated by Scott Neilsen.  I've made a few pieces from this site in the past, but this will be my first opportunity to haft them.  The finished pieces will be used in interpretive programming in the Labrador Interpretation Centre.  Over the coming weeks, I'll post more information on the reproductions and details on a couple upcoming opportunities to hear Scott speak about the site later this spring.

A handy photo for scale, but its hard to make an accurate
reproduction without a lot more photos from different angles.
I won't have access to the original artifacts while I am working on the reproductions, so I'll have to rely on measurements and photographs.  I always take a few straight overhead shots with a scale to use when I print my patterns, but most of the photos that I need are details and oblique angle shots that are not usually printed in reports.  On particularly complex artifacts, I might take dozens and dozens of photos from every angle imaginable.  One of the pieces in the Sheshatshiu collection is a hammerstone with a fairly complex pattern of pitting and flaking around its perimeter.  I decided to take a short video clip of the stone being rotated in my hand to capture the pattern ringing the rock.  I really don't know why I haven't thought of taking video clips before.  With HD video, I can freeze any frame I want and view it as a still image.  If I take a couple overhead shots with a scale to establish the size of an artifact, I can save all kinds of photography time by taking a few seconds of video for all the other oblique angle and edge detail shots.  Kind of kicking myself for not realizing this a decade ago.  After realizing how useful the video clip will be for the hammerstone, I went back and took short video clips of all the other artifacts, like this quartzite projectile point...


Photo Credits: Tim Rast

Learn to Flintknap in Saskatoon this March!

$
0
0

I'll be in Saskatoon, Saskatchewan in a few weeks for a weekend flintknapping workshop.  I'm really looking forward to this.  I love how organized the Saskatchewan Archaeological Society and Saskatchewan Association of Professional Archaeologists have been with this, you can register online Here.  Its limited to 30 participants and I know its filling up already, so please register and share with your friends in Saskatchewan, today.

Photo Credit: SAS/SAPA Workshop Poster

Snowshoeing White Hills

$
0
0
We had yet another perfect weekend for snowshoeing.  We had 20 or 30 cm of fluffy fresh snow fall during the week and then ideal weekend weather for getting out and playing in it.  This time we hit the trails in the White Hills on the northeast edge of St. John's.  There is a fairly extensive network of roads, footpaths, bike trails and power line right-of-ways that criss-cross over the hills.  We spent a couple hours exploring and saw some great country.  When I reviewed our path afterwards I realized that aside from the road, we didn't actually follow any designated trails.  There is certainly more ground to explore in this direction on another trip.


We cut across country for a couple kilometres, but eventually met up with a road and took that back to the cars, which were parked at the federal fisheries complex.
Photo Credits: Tim Rast

Tropical Fish Photos from Cuba

$
0
0
Its cold in St. John's this week.  Being on the water we can expect lots of snow throughout the winter, but it doesn't often get terribly cold.  Minus 40 doesn't really happen here, but this week feels very cold.  There is ice bumping around in the harbour.  I thought that I was pre-heating my shed today, but I only had the fan on, not the heat so when I tried to get some outside work done this afternoon, it was a very chilly experience.  I didn't get any Elfshot work completed enough to photograph and blog about, so here are some pictures of nice warm tropical fish that I took in Cuba over Christmas.


I don't know the names of most of these fish, so I just made them up. This is the Grandfather Camel Fish.


Most of the fish hung out around the grass or coral at the bottom, but these guys picked the floating grass near the surface.  A lot of the time you could see them with little green sprigs in their pointy mouths.


These ones reminded me of giant goldfish.  They were pretty big, with bodies bigger than a banana.  They liked to hide out under rocks or in shadows, so they were pretty difficult to photograph.

I saw one Lion Fish on the last day of the trip.  It was pretty cool looking, but unfortunately he's in the wrong ocean.  Sometime in the last decade or so they were introduced to the Atlantic and Caribbean seas and there is a lot of concern about their spread and their impact on local fish and coral reef ecosystems.  Most of the fish darted around and kept on the move, but this guy just floated there like he owned the place.

Photo Credits: Tim Rast

Bending the Dorset Drum Frames

$
0
0
A mostly bent frame and the
original drum patterns printed
underneath it.
I hope my dislike for bending wood comes across clearly in this blog.  I'm really bad at it.  You might have wondered why I've been so quiet about that Dorset drum project that I started a few weeks back.  Well, its because I've been having a terrible time making progress with bending the wood frame. When I talk about things going poorly in the workshop its usually after I've made some sort of forward progress and have a few learned lessons to report.  While things are actually going badly, I focus on other things. Like tropical fish or snowshoeing.  Mercifully, I've finally made some headway with the frames and I should be able to finish them up fairly quickly and get this blog back on track.

Heat and then slowly
bend over my knee
I was hoping that bending green willow shoots would be so easy that I wouldn't have to pay attention to things like wood grain and growth rings and the cross-section of the wood.  But I was wrong.  After a bunch of trial and error, I finally worked out a system for bending the small drum hoops that gives me a good match for the size, shape, cross-section, and diameter of the original Dorset artifacts.  I'm still not certain that the Dorset drums found at Button Point were willow, but the willow is creating a good match so far.

I bend it to 180 degrees or so in one
session, soak the wood in snow or
water and then finish bending it to
270 degrees.
The best results came from very straight and fairly thick shoots, an inch or more in diameter at the base.  I split them down the middle and planed the centre of the shoots flat.  I removed just enough thickness from the inside of the shoots to remove the pith canal.  On the outside of the shoots, I removed the bark and tried to flatten the wood somewhat.  The trick with the outside of the shoot is to treat it like you are making a bow and avoid violating growth rings.  As you bend the wood the tension grows on the outside of the bend and the lamination between growth rings will want to crack and come apart.


If you look at the cross section through the original drum hoops, they are shaped kind of like a tall skinny salt box house - with a flat bottom and a peak on top. But like a saltbox, the peak has a long edge and a short edge.  The long edge is a long bevel inside the edge of the drum frame on the "top", where the skin is stretched.   I'm not sure whether the hoop was shaped to this cross section before or after bending, but right now my hunch is that it was a bit of both.  I'm finding it easier to bend thicker wood if I carve a long bevel on the top and bottom of the inside face.  I think I'll end up bending it with a top and bottom bevel and then planing off the bottom bevel to create the square edge on the bottom of the drum.   The inner bevels also seem to help avoid some of the compression folds or pinches that want to form on the inside of the curve as you bend the wood.  There are a couple compression folds in the original artifacts, so I'm not too worried about a few showing up in the reproductions, but I don't want them to become so acute that they harm the integrity of the drum.  These instruments are meant to be played.

The heat gun is clamped in a vice.
Its a little simpler and less prone to
scorching than an open flame or
hotplate
To actually bend the wood, I'm using a combination of dry heat and steam-bending and boiling.  I suspect that if I had a pot big enough to boil the whole stick then I could just boil the wood and bend it around some sort of jig or frame in one go.  But I don't, so I'm using dry heat from a heat gun to incrementally bend the wood to at least 270 degrees, at which point the hoop will fit into a pot that I can boil on the stove and finish bending with boiling.  I found that it was safer to only apply heat from the heat gun to the inside of the bend as I went along.  The heat gun is strong enough to heat all the way through the wood to the outside surface, but if I applied the heat directly to the outside of the bend this outside surface would dry out and become prone to cracks and delamination.  Its a bit of an ordeal, but the occasional scorching from the dry heat is helping antique and harden the wood as I go, so I don't mind as long as its working. I had lots of trouble with this, but I have a system going now that seems to work.

The fish shaped hoop is done with
dry heat for now.  I'll boil it and clamp
it like the one clothes-pinned to the
pot lid.
I had tried boiling sections of the wood outside, but it is so cold here now that the part of the stick outside the pot would freeze and want to crack while I was bending the part inside the pot.   The willow also stays very flexible when only wet heat is used and wants to straighten itself out again, which makes clamping vital.  On the other hand, using dry heat the wood stays bent a little better as the moisture in the green wood is driven out and the new shape is locked into the wood. So far these frames seem to be holding up.  I have them bent a little smaller than they need to be to allow for some springback when the clamps come off.  The next steps will be working on the scarf joint to connect both ends of the hoop to each other and the groove that runs around the outside circumference of the hoop for the lashing to hold the skin on.

Photo Credits: Tim Rast


Continuing the Dorset Drums

$
0
0
This groove runs all the way
around the drum and will be
used to tie down the caribou
rawhide drum skin.
I continued to work on the Dorset Palaeoeskimo drum frames today.  I've cut the hoops to length, incised the groove to fasten the skin down, and finished the scarf joint to tie the hoop together.   There were two drums found at the Button Point site off the north end of Baffin Island and I'm using the more complete of the two for my model for these reproductions.   The incomplete drum is missing about a fifth of the hoop and the handle is partially broken.  It has a slightly lighter frame than the one I'm reproducing and the details of the scarf joint are less obvious.

The scarfed ends with the incised
grooves for tying the hoop closed
with sinew
The scarf joint that I'm using as the reference has about 5 cm of overlap and three very well defined lashing grooves.  Once I bent the split willow shoot to a complete 360 degree circle a little bit smaller than the intended drum diameter I cut the wood to the correct length, which in this case was about 24" or 61 cm as measured along the outside circumference.  I cut and shaped the top and bottom edges of the rim, to give it a peaked top edge and square bottom edge and then incised the groove around the entire outside of the hoop.  I carved the wedge shaped scarf area on each end and cut the three opposing lashing channels.

When they went into the pot they
were still pretty tight circles, but after
a few minutes of heat they expanded
again.
At this point I boiled the drums again to cinch the hoop closed and ready them for the sinew lashing.  The wood became flexible again and the hoops started to expand in the water, which made matching up the scarf joint tricky.  I wound up wrapping the whole hoop around a pot lid again and using clothespins to temporarily hold it in place before lashing the hoop closed with wire and pinching the join tight with clamps.  The wood at the scarf joint is necessarily thinner than the rest of the drum frame so the wood wanted to bend more there than elsewhere, creating a bit of a sharp angle in the hoop.  The hoop became shaped more like a fat egg, with the little end at the joint, than the perfect circle that I was trying for.    That bugged me a little until I compared the reproduction to the photo of the original artifact and noticed that it has the same shape.  Evidently, the Dorset drum maker had the same problem that I had, which made me feel better.  The only thing better than intentionally making a matching reproduction is accidentally making a matching reproduction because you happen upon the same design and construction challenges as the original maker.

The photo on the left shows two drums stacked on top of each other.  The one in the middle, with the long handle pointing down and to the left is the one that I'm trying to match.  The scarf joint connecting the two ends of the hoop is in the 3 o'clock position and you can see how the drum hoop bends sharply at this point.  The reproduction on the right is oriented the same way, the clamps running out of the frame on the right are pinching the scarf joint together.  You can see how it also bent sharply where the thin ends of the wood overlap each other.
Photo Credits: Tim Rast

Dorset Drums Assembled

$
0
0
Button Point drum reproductions
The Dorset Palaeoeskimo drum reproductions are finished now, except for the drying and the drumsticks.  I'm starting to get hints of what they might sound like, but the skins are still a little too wet to know for sure and I need the right kind of drumstick to really unlock their sound.  The drums are small, but they look absolutely tiny in a lot of these pictures.  I suppose my hands are bigger than most Dorset people's would have been, but there must also be some weird perspective going on in some of these shots, because they don't seem quite this teeny-tiny in real life. Here's some more info about the real-life artifacts that these reproductions are based on.

The braided sinew cord that holds the
caribou rawhide drumskin in place
begins and ends at the handle, where
it is wrapped partway up the handle.
For the most part the frame is held together with friction and sinew cordage.  I decided to reinforce the joint between the handle and the hoop with a bit of hide glue.  I think that the original drums may have been designed for the handle to be removable for easier transport and storage, but I elected to permanently attach the handle with glue and by wrapping the lashing for the drum skin tightly around its base.  The main reason for this is that I'm concerned that the wedge shaped handle will split the wood of the frame if it is removed and re-inserted too often with too much pressure.  The original artifacts have splitting in the frame that starts from the hole for the handle and I want to permanently avoid that in these pieces, if possible.  The splitting in the original artifacts doesn't look like its enough to render the drums unplayable as the orientation of the wood grain necessary to bend the hoop means that the crack will propagate around the circumference of the drum rather than dive out towards the edge.  Still, I don't want to test that theory, because it took a long time to get to this point and I want the drums to work for many years to come.

The reproductions beside the printed pattern of the original drums.  The photo is on a 8 1/2" x 11" sheet of paper and shows two drums stacked on top of each other.  I reproduced the one in the middle.


Each drup hoop has three holes.  I'm not sure what these
two are for, but the far one (between the electrical tape and
clamp on the far side of the hoop) is for the handle to attach.
I wrapped the wood with electrical tape while I cut the holes
to minimize the risk of accidentally cracking through the
wood.
On both of the original Dorset drum artifacts there are holes in the frame opposite the drum handle.  The drum that I reproduced has two of them, one directly opposite the handle and one a few centimetres away.  At one time I was planning to use these holes to anchor the braided cord that lashes the drum skin in place, but I've decided to leave them open.  I've studied the photos of the holes more carefully and I can't see any indication that they might have had a cord or line running through them.  To me, they look more like the hole where the handle is inserted.  I made a few little wooden tabs to stick in the holes.  I have a couple theories about what those holes might be.  One idea is still that they serve as an anchor point for the line holding the skin in place, but instead of the line passing directly through the holes, it could have been attached to a small peg inserted into one of the holes.  In my reproductions, I've wrapped both ends of that line around the drum handle to better reinforce that joint, but as I've said, I suspect that the handle was actually designed to be removable.  Attaching the skin lashing to the opposite side of the drum would free up the handle, so that it could be removed for storage and or transport.  Or, perhaps the holes could be used to attach something that somehow changes the sound of the drum. Maybe a rattle or something that vibrates?  I don't know.  A third theory  (the one that I'm leaning towards at the moment) would be that something symbolic, perhaps a carving, could be attached to the drum.  Inuit drums were often part of the Shaman's toolkit and the Dorset drums have been interpreted similarly.  My hunch is based on other people's unpublished research, so that's all I'll say at the moment.  I might come back to it when their paper comes out.

Despite the size, they sound very
similar to large Inuit drums, but with
the volume turned way down.
I'll talk more about what the drums sound like in another blog post and hopefully have a short video clip, but my first impression is that they sound more like Inuit Drums that I was expecting.  The smaller size doesn't seem to affect the quality of the boom, but it does affect the volume.  Inuit drums are designed to be played by striking the frame with a drum stick.  The problem I'm having right now is that the "boom" from the drum is so quiet that the "clack" of the stick on the frame drowns it out.  I can get a good sound by tapping the frame with my fingertip, but so far, when I use a stick all I hear is the clack of stick on wood.  My plan is to wrap the stick in the softest fur I can find to muffle the sound of the stick/frame contact so that the low "boom" from the drum skin is audible.

Another view of those extra holes.  The drum on the floor
in the background has small pegs inserted into the holes.
If I can get that far, I'll be happy.  The archaeologist who I am making one of the drums for is a musician and a drummer.  I know what I'd like to be able to play on the drums, but maybe the more realistic goal is to get the instruments to the point where someone who actually knows how to play can start experimenting.  The results so far haven't been exactly what I was expecting.  I wasn't expecting the boom of the drum to sound as much like the much bigger Inuit drums as they do.  But they are just so small and delicate, that I don't think they could have been played as vigorously or loudly as the later Inuit drums.  You'd be able to hear them in a small skin tent, but I don't think the sound would carry outdoors.  Its a drum for small places and few people to hear.

I like the pattern that is visible on the drum skin on the one in back.  For reference, the hoops are about 7 inches in diameter.

Photo Credits: Tim Rast

Dorset Drums: A 1500 year old song?

$
0
0
Late Dorset drum reproductions from
the Canadian Arctic
I think that the Dorset Palaeoeskimo drum frames from Button Point may have the oldest pieces of written music in Canada etched into their frames.  I don't think there are any radiocarbon dates from Button Point, but stylistically the artifacts are Late Dorset, which began about 1500 years ago and lasted until the Dorset disappeared sometime between a thousand and five hundred years ago.  The Late Dorset time period is marked by a fluorescence of artwork, primarily carvings, that may have magical and religious significance.  Dorset art is often associated with shamanism, and the drums from Button Point are also believed to have been part of a shaman's tool kit.

In this video clip, I introduce the drums within the context of Dorset shamanism and demonstrate the sounds that the drums make when played:


The skeletal motif on an ivory bear
One of the most common design elements that appears in Dorset art is the incised representation of a skeleton, which archaeologists call the X-ray skeletal motif.  These skeletal motifs, sometimes reduced to an abstract representation of the spinal column, are found on naturalistic animal carvings, but also on abstract carvings and other objects.  One theory is that these carvings were religious or shamanistic in nature and some of the figures suggest that humans, most likely shamans, could even transform themselves into animals.  There are figures in Dorset art that seem to depict people transforming into animals and as a student the way the skeletal motif and this transformation was explained to me was that a shaman could enter a trance-like state, strip off their own skin down to their skeleton and then redress themselves in the skin of the animal that they want to change into.  We know by analogy with later Inuit groups and other shamanic cultures that rhythmic drumming and chanting can be used to induce a trance-like state.   Dorset drums could have filled a similar role.

The drums, a photo of the original artifact and a drawing of
the tick marks located around the edge of the frame.
On the back of the Button Point drums there are incised lines ornamenting the frame.  Some of these lines seem to represent the spinal columns seen in the x-ray skeletal motif.  The patterns of marks on each drum are different, and I don't know a lot about the design on the incomplete drum, but the more complete drum frame has a pattern of marks incised on it that I think could be interpreted musically.  There are 13 sets of tick marks incised into the drum frame.  They are spaced evenly around the circle like the numbers on a clock.  The pattern does not appear to be random, instead it appears to count up and down from the handle towards the top of the drum, where two sets of eight tick marks are carved with a central line running through them that suggests that they are also meant to represent spinal columns.

I used rabbit fur on the
willow drum stick to muffle
the clack of wood striking
wood
The pattern appears to be a mirror image on the left side and right side of the drum.  You can see the pattern of tick marks in the diagram below, but I'll walk you through it, starting at the handle which is marked with three tick marks.  If you go clockwise or counterclockwise, the next mark is a single tick mark, then a gap and two tick marks, a gap and three tick marks, a gap and four tick marks (probably), a gap and six tick marks, a gap and eight tick marks (with a spinal column) and then the pattern counts down again, eight ticks with a spinal column, six ticks, four ticks (probably), three ticks, two ticks, one tick, and then you are back at the handle.  I say "probably" on each of the sets of four tick marks because there is damage on each side of the drum in that same spot, so I'm speculating a bit about what might have originally appeared there.  On one side you can see at least three tick marks just beside the damaged area and I think the best fit with the rest of the sequence would be four tick marks, because it continues the sequence of one, two, three, four if you count up from the handle by ones, as well as the sequence of eight, six, four if you count down from the spinal columns by twos.

The sequence of incised marks on one of the Button Point Dorset drums.  The shaded areas on either side are damaged areas of the artifact, so the presence and number of ticks in each of those positions is speculative.  Although on the left hand side, you can see that at least three tick marks were carved into the frame.

I really like the look of the drum with
the transparent skin, but it requires
more preparation to get a good
sound out of it because the skin
dries and stretches unevenly.
In the context of a drum, I'm very tempted to interpret that sequence of ascending and descending numbers musically and from the point of view of a Dorset shaman's drum, I'm very tempted to interpret the count as leading from a normal state of being to a trance-like state or transformation, as indicated by the spinal columns carved at the height of the sequence.  I've tried to illustrate the sorts of things that I'm thinking in the video clip below.  I'm not sure how you could begin to read a 1500 year old piece of music, but perhaps the tick marks represent a cycle of singing or chanting that should take place over a period of time, like the cycle of prayers indicated by the beads on a rosary.  Maybe the marks are literally marking out drum beats to play a specific song.  Perhaps the ticks are marking positions on the drum that should be played in a particular sequence.

In this clip I talk about the incised marks on the drum frame and try a couple different rhythms that I think the ticks could be illustrating:


I do think the marks are a piece of written music, but I don't know if we'll ever be able to say with certainty what it is saying.  Maybe you have an idea?  Does this sequence of numbers make sense to you musically, or do you think it is marking out something completely different?  Random is not an option.  Someone placed them there intentionally and put at least some thought into their meaning.

Photo Credits:
1, 3-6: Tim Rast
2: Amazon.com

Snowshoeing Father Troy's Trail Part II

$
0
0
Sunday was a perfect morning for snowshoeing.  We returned to Father Troy's Trail running between Flatrock and Torbay and did a section in the middle of the trail between Church Cove and Whale Cove.  The snow was ideal for snowshoeing, with a very thin ice glaze on top and dense wet snow underneath.  It was exactly the sort of snow that snowshoes let you stay on top of.   The trail was well marked and offered a variety of difficult, moderate, and easy options through the woods or along the coast.  The day provided a much needed break between busy weeks in the workshop. 

The cliffs at Church Cove

Little bridges - I love little bridges!

The view back towards Church Cove

The cliffs at Whale Cove

Torbay in the distance


Photo Credits: Tim Rast

Researching the Beothuk Harpoon

$
0
0
Beothuk Harpoon Head, Mary March Museum
In the workshop, I'm back to making sets of Beothuk and Intermediate period reproductions for various branches of the Provincial Museum and Provincial Historic Sites.  Some of these reproductions are familiar, for example, a Beothuk bow and arrow is going to the Mary March Provinicial Museum in Grand Falls-Windsor, but others will be new reconstructions based on fresh evidence.  One of the pieces that I'm especially excited to be working on is a Beothuk harpoon.  There are a handful of Beothuk harpoon heads and Shawnadithit, the last known Beothuk woman, left us a drawing and description of what she called "a-a-duth", the Beothuk sealing harpoon or seal-spear.

Beothuk Harpoon Head,
 Mary March Museum
My plan is to make a full-sized reproduction of the harpoon drawn by Shawnadithit with an iron bladed harpoon head, like those on display in the Mary March Provincial Museum.  During the last year of her life, Shawnadithit lived in St. John's under the care of William Eppes Cormack.  Cormack made notes on the Beothuk harpoon that appear to caption the drawing made by Shawnadithit and his knowledge of the implement seem to be based on conversations with her.  Likewise, James P. Howley's discussion of Beothuk harpoons is also provided as a caption to her drawing when it was published in his 1915 book, "The Beothucks or Red Indians." Howley's description is a combination of Cormack's writings and his own interpretation of Shawnadithit's drawing.  Both of the passages below can be found published in Howley 1915.

Shawnadithit's drawing: Sketch VIII, detail below


Manuscript of W.E. Cormack's, apparently written after his last expedition in search of the Red Indians.

The spears were of two kinds, the one, their chief weapon, was twelve feet in length, pointed with bone or iron, whenever the latter material could be obtained, and was used in killing deer and other animals. The other was fourteen feet in length and was used chiefly, if not wholly, in killing seals, -- the head or point being easily separated from the shaft, -- the service of the latter being indeed mainly, to guide the point into the body of the animal, which being effected, the shaft was withdrawn, and a strong strip of deer skin, which was always kept fastened to the spear head was held by the Indian, who in this manner secured his prey. This method of taking the seals may be compared to that of taking the whales. The handle of the harpoon being chiefly to guide the point, to which the cord is attached, into the body of the animal and then hauling against it until the fish is exhausted. The Esquimaux adopt a similar plan the point of their harpoon or spear being somewhat different in form.
I believe the Beothucks derived the idea of this harpoon from the Eskimos, who are adepts in its use, are known to have possessed it a long time, and who moreover, depend more upon the seal and walrus for their livelihood than the former had any occasion to do. It is a most ingenious weapon, and while the general structure is the same, that of the Beothuck was slighter and more neatly constructed. It was called by them a-aduth.
-W.E. Cormack ca. 1828 


a-a-duth or Spear for Killing Seals 12 feet long (bone) (iron)
amina Deer Spear (iron)
Sketch VIII

This figure is followed by two full length spears, one for killing Seals the other for Deer. The first called "A-aduth," is represented as being 12 feet long (?). It consists of a long straight wooden handle, to which is affixed, at one end an iron point of a triangular shape set in a bone socket. This socket is not permanently attached to the handle but is kept in its place by a long string, one end of which passes through two holes bored through the bone and securely tied, while the other end is brought along the handle, passing over a notch at the further end, and thence back to about the middle of the handle where it would appear to have been grasped by the operator. The bone socket, where it meets the handle is forked and has a groove cut in it, into which the end of the handle is inserted, the string being then drawn tight, and firmly grasped by the hand tends to keep the point in its lace while striking the animal, But immediately the spear head enters its body, the string is released and the spear separated from the handle, which remains in the hand, while the ample coil of line shown, allows full play to the animal in diving. The spear head is tied in such a way that so soon as it penetrates the skin and flesh of the seal and a strain is put upon it by the exertions of the wounded animal, it turns crossways in the wound which prevents its being withdrawn. The whole contrivance is one of a most ingenious character, and I have little doubt the idea was borrowed from the Eskimo, who appear to have been the originators of this kind of weapon. It only differs from that of the latter people in being more slightly and delicately made, in having a triangular instead of a leafshaped iron point, and in the absence of the float or drag attached to the opposite end of the line. I would surmise from this that the Beothuck did not pursue the seals in his canoe, on the water, as the Eskimo does, but speared them on the ice, or in their blow holes. This seems the more probable from the fact that their frail birch bark canoes were ill adapted for the pursuit of the animal in its native element.

-James P. Howley 1915

Can you even
see this from
12 feet away?
There is some discrepancy in the accounts on the lengths of the deer spear and the harpoon; Howley and Shawnadithit's drawing say that the harpoon was 12 feet long, while Cormack suggests that 12 feet is the length of the deer spear and that the harpoon was actually 14 feet long.  Either way, that is a very long harpoon.  I intend to make the reproduction at least 12 feet long, although for the sake of transportation and storage, I will make the shaft in two parts that can be broken down and reassembled.  I'm looking forward to this, I have to admit I'm having a tough time visualizing the mechanics of a 12 foot harpoon, so this will be a learning experience for me, too.

Photo Credits: 
1-2: Tim Rast
3-4: Details of Shawnadithit's Sketch VIII from Howley 1915

MUNArch Stone Tool Making Workshops 2014

$
0
0
Obsidian Biface
Beginning next week, MUNArch, the Memorial University of Newfoundland undergraduate archaeology society will be sponsoring three weeks of flintknapping and ground stone tool making workshops.  I'll be leading the workshops and the first sessions are on the evenings of Monday, March 3rd and Wednesday, March 5th.  The first workshops happen in less than a week, so if you are interested in attending, please contact MUNArch as soon as possible to reserve your space: munarch@gmail.com

2013 MUNArch workshop
There are three different workshops offered and each is available on either a Monday or Wednesday evening, with a maximum capacity of 15 people in each session.  These are all introductory classes, so no experience is necessary.  If you have previous experience and some more advanced questions, please feel free to join us and I'll work with you as best I can.

Week 1: Ground Stone Ulus

Ground Slate Ulu
Learn to chip and grind ground stone ulus from flat slabs of slate.  Drill through the slate with a bow drill, prepare a wood handle and lash it into place.  This is the first time that this workshop has been offered through MUNArch in St. John's.
Monday, March 3rd or Wednesday, March 5th

Week 2: Introduction to Percussion Knapping

Biface made with percussion
Learn the basics of hard hammer and soft hammer percussion.  Strike a flake from an obsidian core and learn how to thin and shape the flake using stone and antler percussors.
Monday, March 10th or Wednesday, March 12th

Pressure flaked glass and
obsidian arrowheads

Week 3: Introduction to Pressure Flaking

Learn to use pressure to push small, controlled flakes off of your stone tools.  Pressure flaking is how you turn a flake into an arrowhead.
Monday, March 24th or Wednesday March 26th
(Note that this follows two weeks after the percussion workshop, I'll be out of town March 17 and 19th)


The costs for the sessions are as follows:
$50 for all three sessions (3)
$40 for two sessions (2)
$25 for one session (1)

The time for each event will be 6:00pm, and the room in which the sessions will take place on the MUN Campus will be assigned at a later date. Ages 16 and up. If you wish to attend any of these workshops, please email MUNArch at munarch@gmail.com. 

Photo Credits:
1,2,4,5: Tim Rast
3: Phillip Cairns, courtesy of Labrador CURA

Spring 2014 Flintknapping Workshops in Edmonton

$
0
0
I'll be teaching a pair of flintknapping workshops in Edmonton on the weekend of March 15 and 16th at the University of Alberta.  These workshops are generously sponsored and organized by the Strathcona Archaeological Society, The Archaeological Society of Alberta, and the University of Alberta Department of Anthropology.  Saturday's workshop will be an introductory day where we will learn the basics of hard and soft hammer percussion as well as pressure flaking.  No experience is necessary, but if you have tried knapping before, this will be a good opportunity to refresh your skills and troubleshoot problem pieces. On Sunday we will focus on ground slate ulus and stone drills.  Make a stone tipped drill in the morning and use it to drill the lashing holes in your slate and wood ulus in the afternoon. Contact arkyedmonton (at) gmail.com to register.


March is going to be busy

$
0
0
An Open Minds workshop at The Rooms
It's kind of a hectic month.  I still have a couple big orders to fill in the studio, but workshops and demonstrations have really piled up in my March schedule as well.  At the moment,  I have 14 workshops, one knapping demonstration and a public talk scheduled across three different provinces during the month of March.  Some of those workshops are with elementary school kids while others are with university students and members of archaeological societies in Alberta and Saskatchewan.

Securing the gut hafting on an ulu
at a MUNArch workshop.
Tonight is the second MUNArch ground stone ulu workshop.  We had 10 people come out on Monday night and everyone finished a slate ulu.  This is basically the same workshop that I do with the Open Mind's students at The Rooms, but we use sinew and gut lashing instead of string and people are responsible for chipping their own blanks and cutting their own handles.  For kids, we start with sawed blanks and handles that are already cut to length.

A Little Passage
(pre-contact Beothuk) knife,
ready to glue and lash together.
In the studio I'm continuing to work on Beothuk and Intermediate period reproductions.  The Intermediate period pieces must match a specific suite of artifacts from Sheshatshiu, Labrador, while the Beothuk pieces can be a little more generic.  I'm pulling from a lot of different archaeological and historical references for the Beothuk pieces.  For example the knife on the right is based on a biface found by Ralph Pastore on Inspector Island but the handle comes from a wood handle that was photographed by James Howley for his 1915 publication, The Beothuck or Red Indians.  For the Intermediate period pieces from Sheshatshiu, I'm using ethnographic Innu artifacts to help fill in some of the blanks.

The scraper in the upper left hand corner is meant to be a reproduction of the scraper in the photo immediately below it.

The original artifacts will be shown in the display as they were found and the reproductions will illustrate how they may have appeared to the people who originally made them, complete with lashings and handles and all the missing pieces that were not preserved in the ground.
Photo Credits: Tim Rast

Beothuk Harpoon Head progress

$
0
0
Reproductions and
photo references
The Beothuk harpoon is coming together.  I have all of the pieces on hand, I just need to do some finishing and assemble it.  The harpoon head style is influenced by Dorset designs, but I don't think anyone has established whether or not that influence came directly from interaction between the two groups or if the Beothuk found Dorset artifacts and copied them after the Dorset became extinct.  There were several hundred years when the Dorset and the ancestors of the Beothuk shared the Island of Newfoundland, but its hard to know how many face-to-face interactions they had.  We also don't know how old Beothuk harpoon technology is.  All of the evidence that we have for Beothuk harpoons and harpoon heads come from the last century or two that they were around.

The two holes on the opposite face
meet in a single hole on this side.
At this stage, the harpoon head is blocked out and I'm shaving off millimetres, or fractions of millimetres here and there to match the original artifacts.  I'm making two, so that I'll have one for my own collection after I mount the other on the complete harpoon for the Mary March Museum.  I used an old kitchen knife for the metal endblades.  The original harpoon head has an iron blade cut from a flat sheet of metal, perhaps the pan of a metal trap (McLean 2003).  The endblades are a little shinier than I want them to be when the harpoon heads are complete, so I'll touch them up with muriatic acid to get a weathered, rusty finish to them.  Likewise, the harpoon head will be ochre stained to match the original artifacts.

I got permission first.  Its still a good cleaver.

The pencil marks are there to guide the next round of cutting and shaping, but its very nearly done.

References:
McLean, Laurie
2003 A Guide to Beothuk Iron. NAHOP Artifact Studies 1. Memorial University of Newfoundland.

Photo Credits: Tim Rast

Fitting the Beothuk Harpoon Head

$
0
0
Will it fit?
I got as far as fitting the Beothuk harpoon head onto the wood mainshaft this weekend.  If you recall, the Beothuk harpoon heads have a very thin slit at the base to fit onto the harpoon shaft.  Also, according to Shawnadithit's drawing, Beothuk harpoons lacked the foreshaft seen in many other cultures in the Province, including the Maritime Archaic, Palaeoeskimo, and Inuit.  Before making the reproduction, I had a difficult time reconciling this extremely narrow socket with an all wood harpoon shaft.  It seemed like the harpoon shaft would have to be carved to the thickness of a credit card in order to fit into the thin slot.  I couldn't imagine wood being strong enough to fit such a narrow slot without breaking.  I thought perhaps the Beothuk fit the harpoon heads onto the ends of metal lances, although this is contrary to Shawnadithit's drawing.  After this weekend, I don't believe that anymore, and I think Shawnadithit's drawing of a foreshaft free harpoon could be accurate.

It does!
The main thing that became obvious from making the reproduction was that the thin slot on the Beothuk harpoon is also quite wide.  Near the end of the spurs, it may only be a millimetre or two thick, but it stretches nearly an inch from side-to-side.  I think the trick to fitting the harpoon head onto a wood shaft is to mimic the diamond cross-section of the harpoon head in the wood shaft.  It only has to be thin where it makes contact with the harpoon head socket.  If the shaft is left thick in the middle but tapers towards the edge, then it seems to solve both problems; it fits into the very thin socket, but maintains some strength.

The edge can be slightly charred in a
flame and the charred edge ground
away to create a strong, smooth
edge.
A lozenge shaped or diamond shaped cross-section at the end of the long wood main shaft would work and is relatively easy to make.  Its a form that is easy to make by scorching the wood with fire and abrading the edges against a stone.  We know the Beothuk used fire to both shape wood and season it, so this would fit within their technological approach to woodworking, as well.  For example, a birch bowl was found at the capture of Mary March that was in the process of being hollowed out with fire and there is an historic account of the Beothuk seasoning their bows over fire to dry and strengthen them.  Using fire to shape the shaft would have the added advantage of further hardening the wood.

It only has to be thin around the edge.  The middle can be
left thick, mimicking the diamond cross-section of the
harpoon head.
I probably had enough information to figure this out logically, but, as is often the case, figuring it out in the workshop was a lot easier.   Dorset Palaeoeskimo harpoon heads in this province have a tendency towards being rectangular in cross-section and fit on a rectangular foreshaft.  Likewise, Inuit harpoon heads tend to have a round or oval cross-section and fit onto a round or oval foreshaft.  The Beothuk harpoon heads have a diamond cross-section, so why shouldn't we suppose that they would fit onto a shaft that also has a diamond cross-section?  Its a pattern that I hadn't really noticed before, or explained away as being related to gouged versus drilled holes, but perhaps there is a pattern across many cultures in the northeast that sees foreshaft cross-section mirror the harpoon head cross-section.  If I would have noticed that pattern earlier, it might have made understanding Beothuk harpoon heads less perplexing.

Photo Credits: Tim Rast

MUNArch Percussion Workshop

$
0
0

We are at the halfway point in the MUNArch flintknapping wokrshops.  Three of the six evenings have gone ahead and its been going great so far.  Last week we made ground stone ulus and this week we are working on hard and soft hammer percussion.  I'm off to Alberta and Saskatchewan for more workshops next week, but we'll be back at it in St. John's on March 24th and 26th to finish up with an introduction to pressure flaking.

Some impressive bifaces came out of the first round of Percussion knapping.

A lot of focus.  The room can get pretty quiet at time, except for the sounds of rock breaking.


Photo Credits: Tim Rast

Travel Day

$
0
0

Home for the next few days.
It was a pretty long travel day today.  I made it to Edmonton this afternoon in time to buy some supplies for the weekend workshop and get a long overdue haircut.  My laptop was giving me some grief, but its working again.  I don't need it right away, but I need to finish putting together a powerpoint presentation for talks in Red Deer and Saskatoon next week.  But for now I'm having an early night tonight and an early morning tomorrow knapping with the Archaeological Society of Alberta's Strathcona Centre at the University of Alberta.

Photo Credit: Tim Rast

Edmonton Flintknapping Workshop Wrap-Up 2014

$
0
0
New and familiar faces
What a workout!  I'm recovering this morning from a very enjoyable weekend flintknapping and ground stone ulu making workshop in Edmonton.  The workshop was sponsored by the Strathcona Archaeological Society, the Archaeological Society of Alberta and the University of Alberta's Anthropology Department.  I am very grateful to have been invited to participate in this event for the second year in a row, and especially for the hard work of Strathcona volunteers, Kurt, Peter, Sean and more who kept everything running smoothly.

It was a tough slate to work, so there were a lot of single hole ulu designs.


We had 16 participants on Saturday and 19 on Sunday
We had a good turnout on Saturday and even more people participated on Sunday. On the first day we covered the basics of flintknapping and then on Sunday people made and hafted their own drills and used them to make chipped and ground slate ulus.  I picked up two types of slate at Lowe's when I got into Edmonton on Friday and one variety was reasonably soft.  However, the one that most people wound up using was extremely tough.  The end product will be very sharp, durable ulus, but it was grueling work to get them all done by the end of the day.  Slate of this toughness is on the edge of the capability of an obsidian or dacite drill bit, which is good to know.  It was possible to drill the holes, but the tips became worn and polished very quickly and needed frequent resharpening.

cools designs


Brian working on his pump drill
One of the guys in the group made a pump drill with a flywheel that he shared with everyone.  This helped a lot with the drilling, and the one drill with a nephrite bit that I brought with me helped finish off a few more holes.

drilling, drilling, drilling
Tonight we move the show to Provost, where I'll be knapping with the Bodo Archaeological Society.  Tomorrow, I'll be back in Edmonton doing a demonstration and chatting with students about careers in archaeology at Grant MacEwan University before travelling to Red Deer on Wednesday to give an evening talk to the Archaeological Society of Alberta's Red Deer centre.  There's no time to get bored on this trip.

Sean (standing) was a huge help in making sure that everyone with a question got an answer.  I was happy to have the chance to work with him again this year.

Kurt, well-prepared and focused.

Pressure flaking the drillbits

Splitting the slate tiles.  If there was an upside to the tough slate, it was that it split quite well so by the time we got the chipping, grinding, and drilling stages, it was only half as thick as when we started on it.

more drilling

still drilling

It was great to see everyone.  We had good mix of experience and fresh enthusiasm in the room.
A rare double hole-r. 


A drill and an ulu.  Not a bad day's work.
Photo Credits: Tim Rast
Viewing all 437 articles
Browse latest View live