![]() |
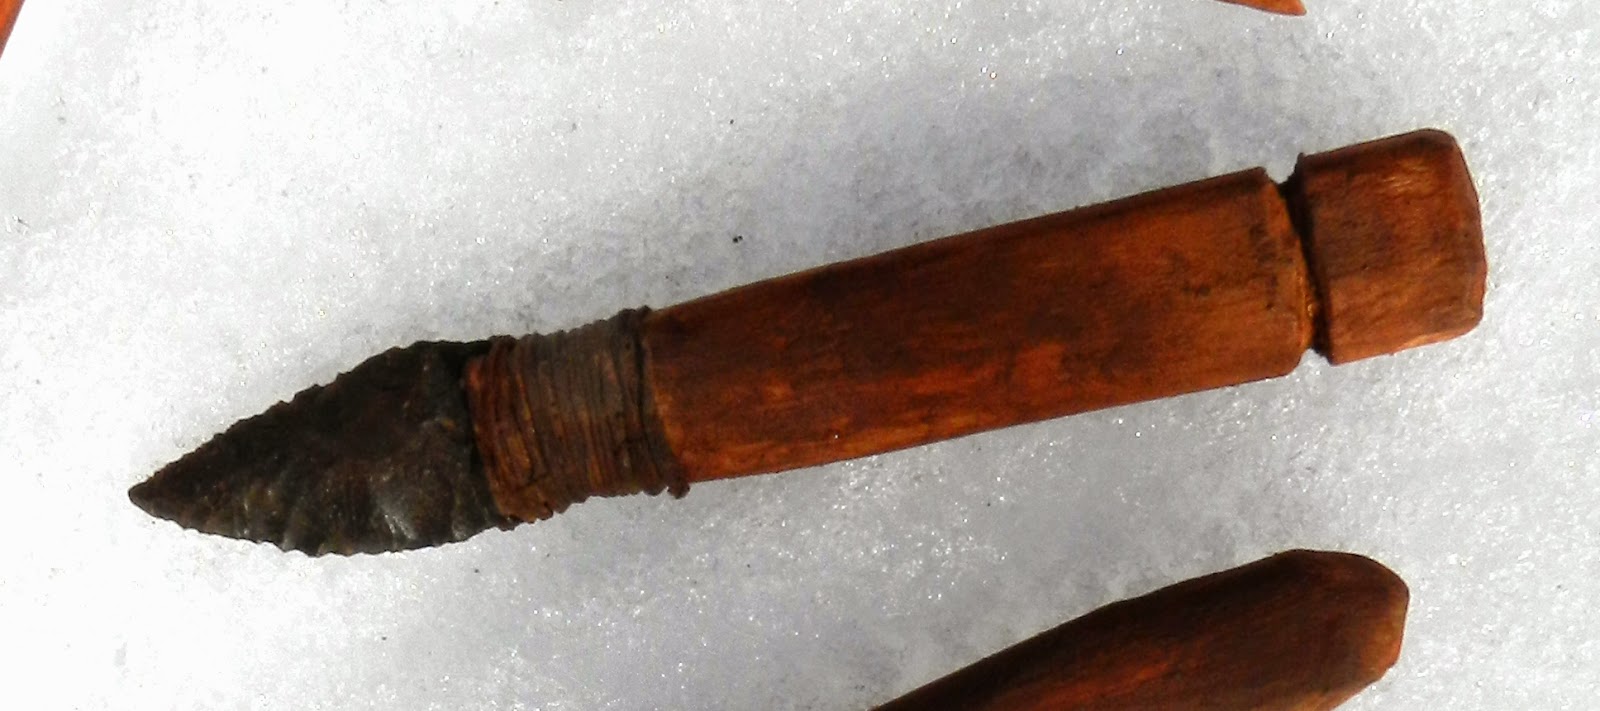
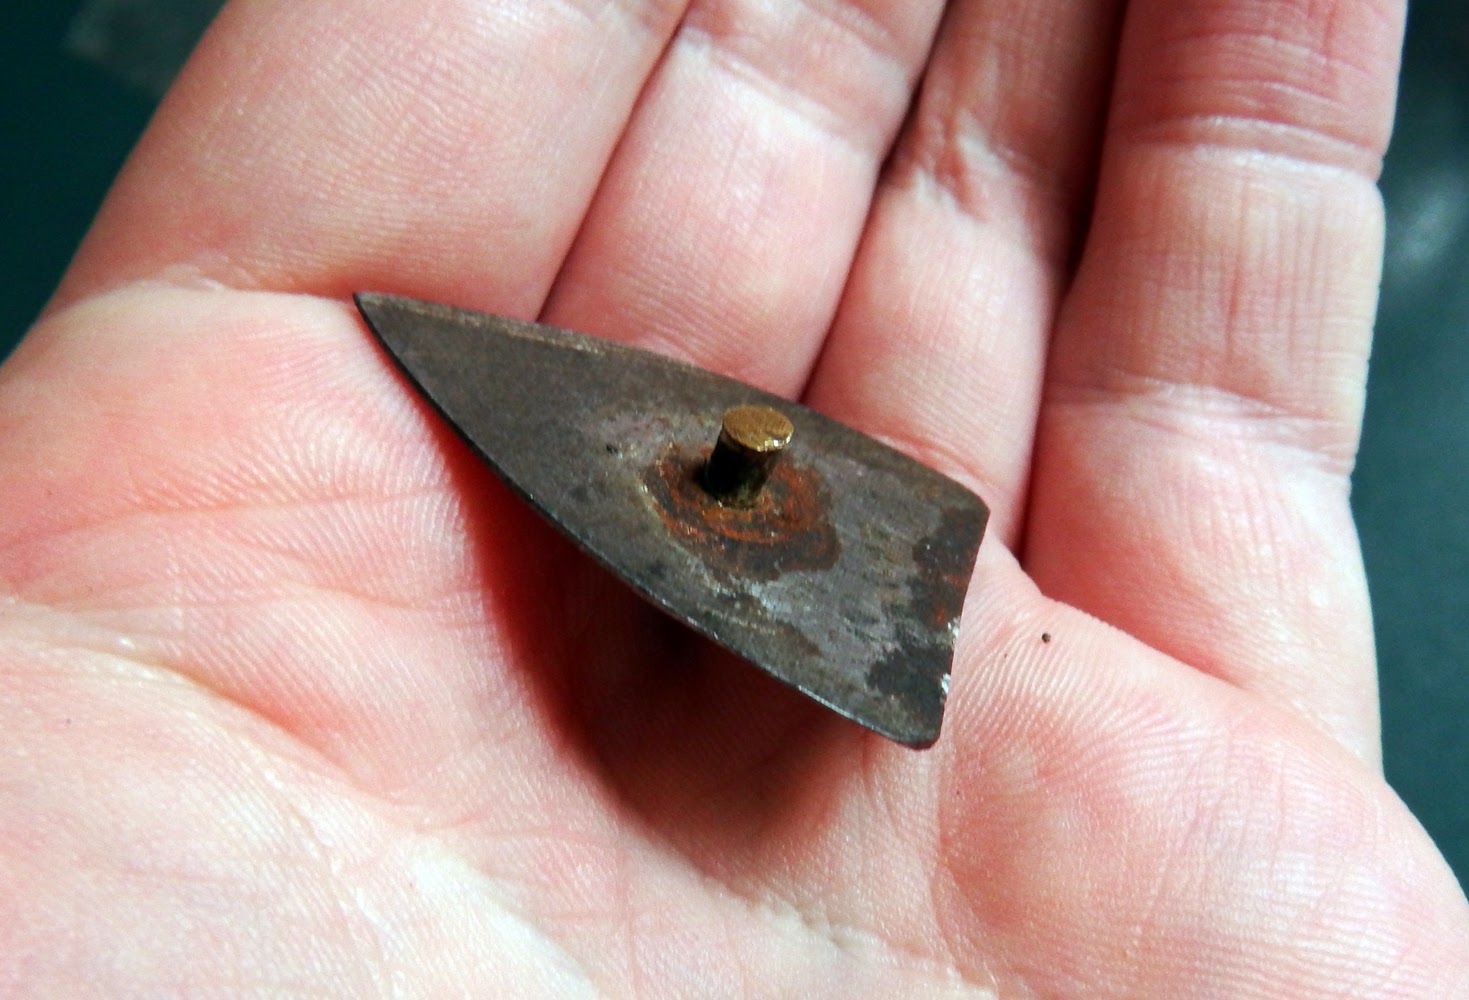
Awesome example of a knapped
projectile point mounted in a foreshaft |
The trip to Saskatoon was over way too soon. Between Friday and Sunday I facilitated a two day flintknapping workshop, presented a talk, and gave a knapping demo. I hope that I don't leave anyone out, but this leg of the trip was sponsored by the University of Saskatchewan, the Saskatchewan Archaeological Society, the Saskatoon Archaeological Society and the Saskatchewan Association of Professional Archaeologists. It was a big workshop, with close to thirty participants on the first day and more than twenty on the second day, but everyone was fantastic and patient with me.
![]() |
| We worked in a long narrow room that easily accommodated 30 knappers. |
![]() |
Matt, Liz, and Tomasin. Bottle melting
shenanigans |
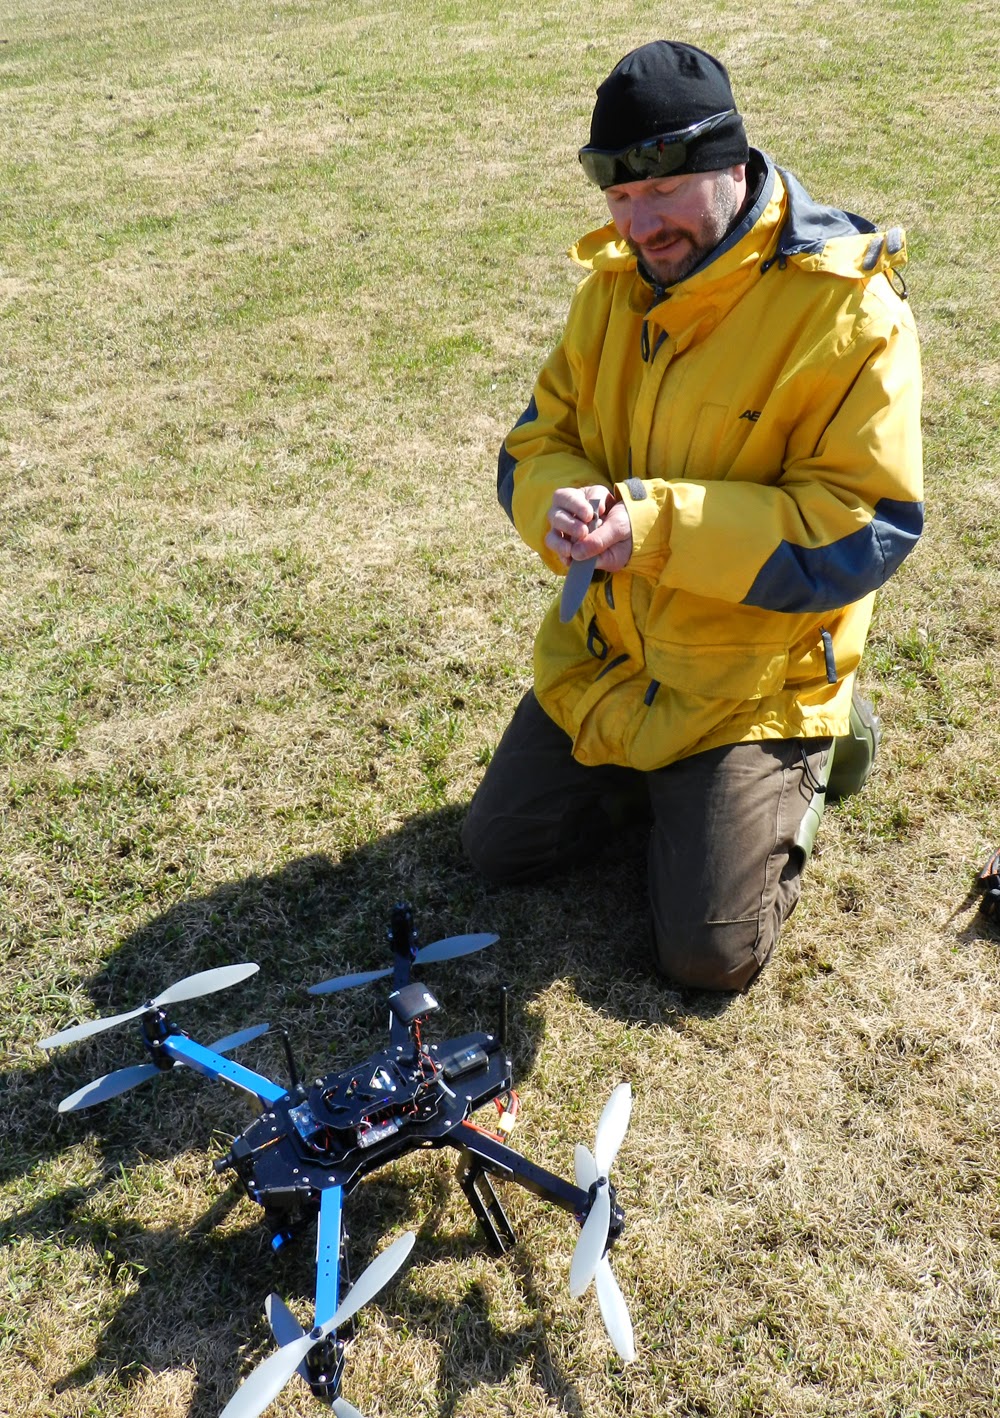
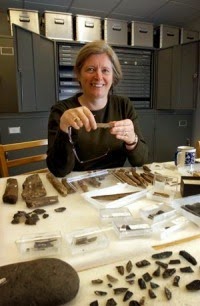
During the workshop, Jack, Phil, Alan, and Matt all helped mentor new knappers and keep the risk of serious injury and blood-stained tools to an absolute minimum. Tomasin and Karin were critical in organizing the materials, advertising the events and handling the registration. It would have been impossible to pull of this event, and the rest of this tour if it hadn't been for all the volunteer time put into planning and organizing all the various parts by Liz Robertson. Liz and I worked together in the Arctic Lab back in our undergrad days at the University of Calgary and she pulled this whole thing together and made sure that I had a place to stay, food to eat, and a ride to get everywhere that I needed to be.
![]() |
| The industrious second day was full of scraping, cutting, knapping, whittling, shaving, gluing, and lashing |
![]() |
This great old building is home to the
University of Saskatchewan's
Archaeologists |
The talk, demo, and workshop were all held in the same room in the Archaeology Building on the campus of the University of Saskatchewan, which meant I only had to set up once and clean up once, which was very nice. I've been to the UofS campus once or twice to attend conferences, but this was my first visit where I got to spend much time in the Archaeology and Anthropology Department. The whole campus is quite beautiful, with it stone buildings in the Collegiate-Gothic style. The Archaeology building is the most archaeology-looking archaeology building I've every been in. When you walk down the hallways you expect to see Indiana Jones climbing out of one of the classroom or office windows and sprinting away across the campus.
![]() |
| A display in the department |
![]() |
| A familiar name in Newfoundland and Labrador archaeology as well |
On Friday afternoon, I did a flintknapping demo for the Archaeology Department. Over the week, I stumbled upon a new format for knapping demos that I think I'll probably continue to use. Rather than make a single large-notched biface, I made a rough portable bifacial core to show the basics of hard and soft hammer percussion and then use one of the flakes from that core to pressure flake a small arrow or dart point. The advantage of this is that I can pause the percussion work relatively early and jump to pressure flaking and make a pretty, notched projectile point for everyone to see. Both the portable core and the pressure flaked projectile point are better matches for actual artifacts than the big lumpy "spear points" that I usually force out in demo. I'm happier with the end results, the narrative is more interesting (I think), and I can produce two end products, rather than one in the same or even less amount of time.
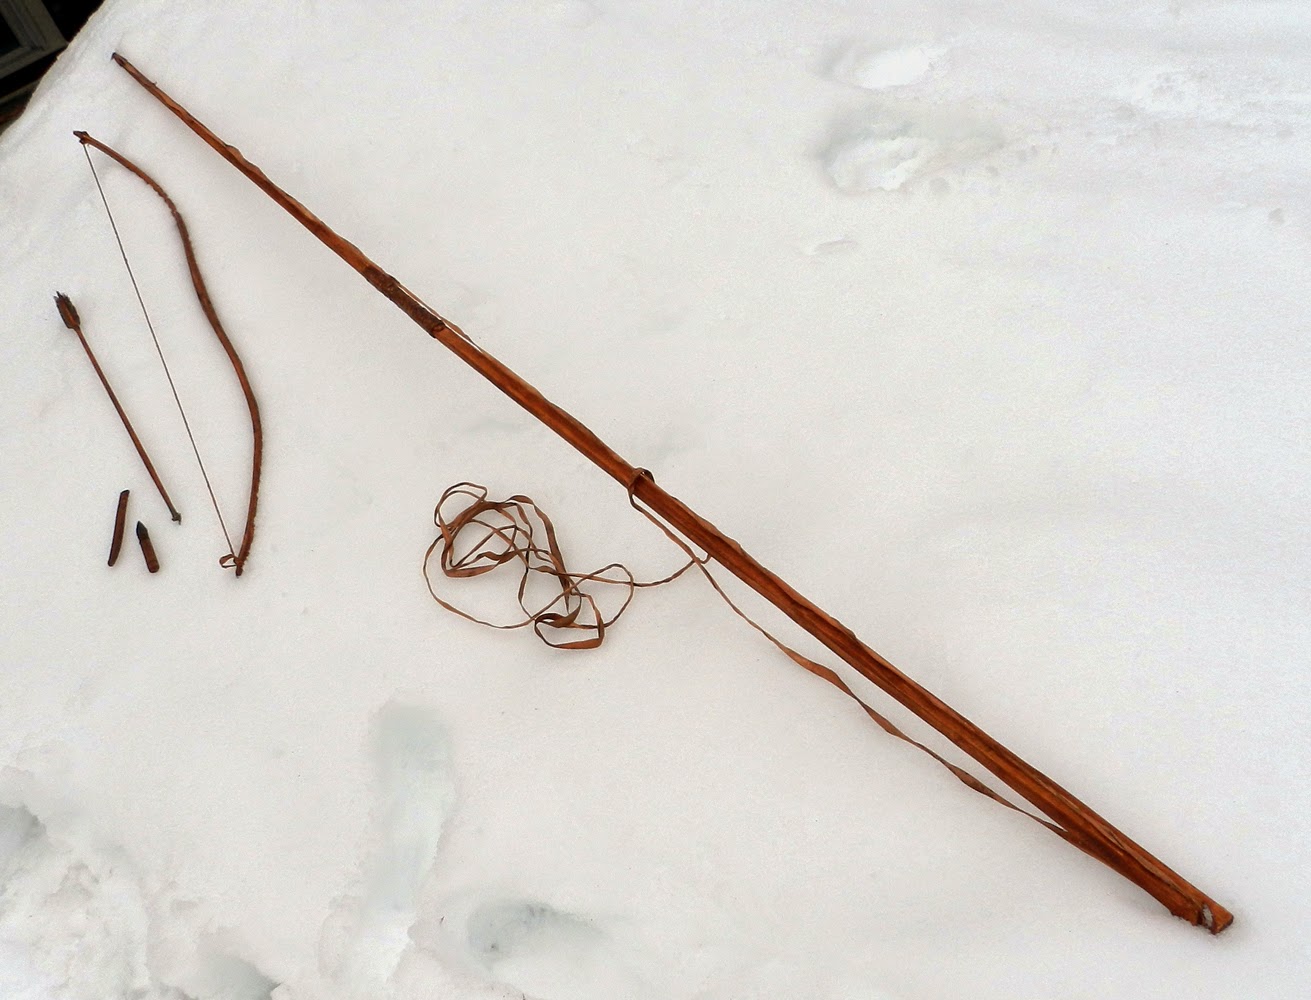
![]()
On Friday evening, it was my very great pleasure to give the Jesse Caldwell Memorial Lecture to the Saskatoon Archaeological Society. I can get nervous giving talks, there were some archaeologists in the audience who I have a lot of respect for, and despite Liz embarrassing me with phrases like "visiting scholar" in her introduction, the folks in Saskatoon are all so nice that I think it went off without a hitch. The title of the talk was "Recreating the Arctic: The Story of an arrow, harpoon and drum". I talked about the Independence I driftwood arrow, the L'Anse aux Meadows Harpoon, and the Button Point drums in a show-and-tell format. Its a small sample size (n=1), but in my experience playing a Dorset drum will mesmerize a baby at 50 feet 100% of the time.
![]() |
| That's a lot of tarp space |
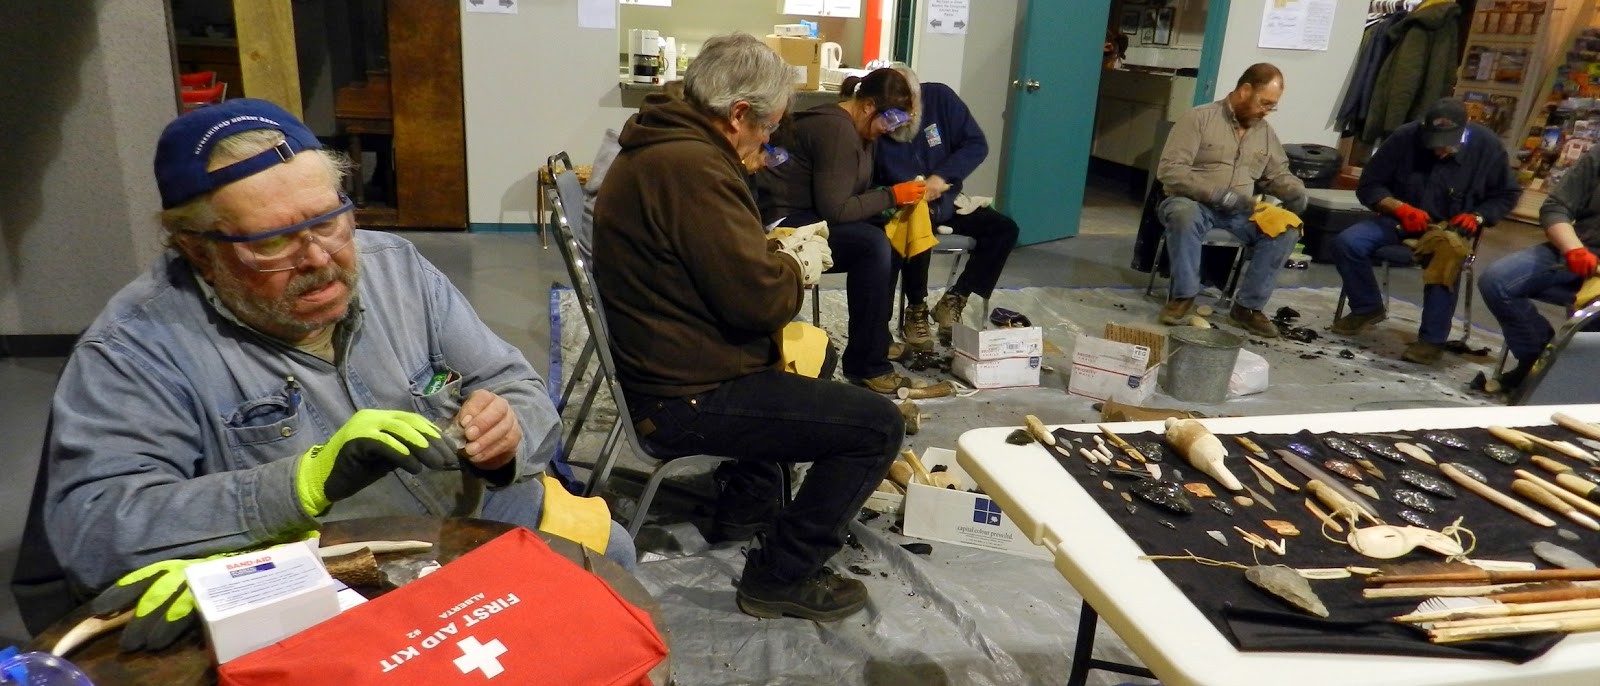
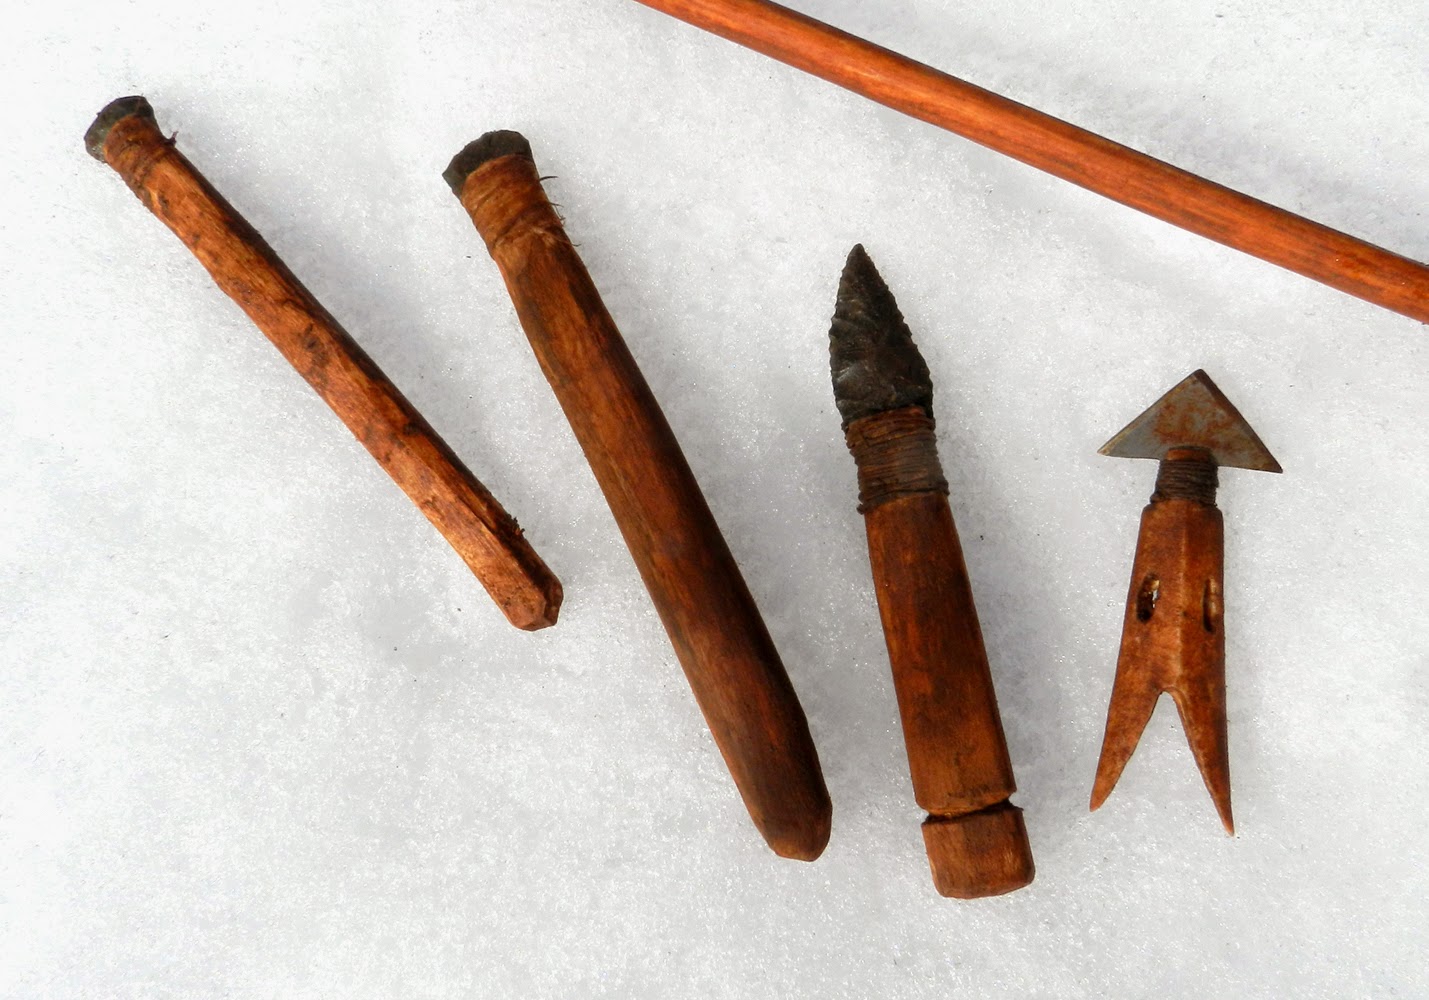
On Saturday and Sunday we held the two day flintknapping workshop. Saturday was a day to cover the basics and review percussion and pressure flaking for people with some knapping experience. Its was an introduction for some and a refresher for other. With nearly 30 people in the room, it could have been an exhausting day, but there were a lot of experienced knappers willing to share what they knew with others and everyone was just so darned patient and nice that I didn't feel run off my feet making the circuits and helping people with their problems. On Sunday we had a project day. This was my first time knapping in Saskatoon, so we focused on hafting. We made Hoko knives in the morning and people used them to whittle more complex hafts and foreshafts for their scrapers, knives and projectile points throughout the day. We used sinew, gut, and rawhide for the lashing and spruce gum and local Saskatchewan red ochre for the glue.
![]() |
| Jack (standing) dedicated a lot of his workshop time to help a the knappers on Sunday morning who couldn't attend on Saturday. |
![]() |
Mahogany Obsidian
and chert points |
The four days that I spent in Saskatoon flew by and I really hope we can do it all again some day. It was great reconnecting with old friends, and despite the short amount of time I spent there, I think I made some knew friends that I'd like to see again.
Photo Credits: Tim Rast
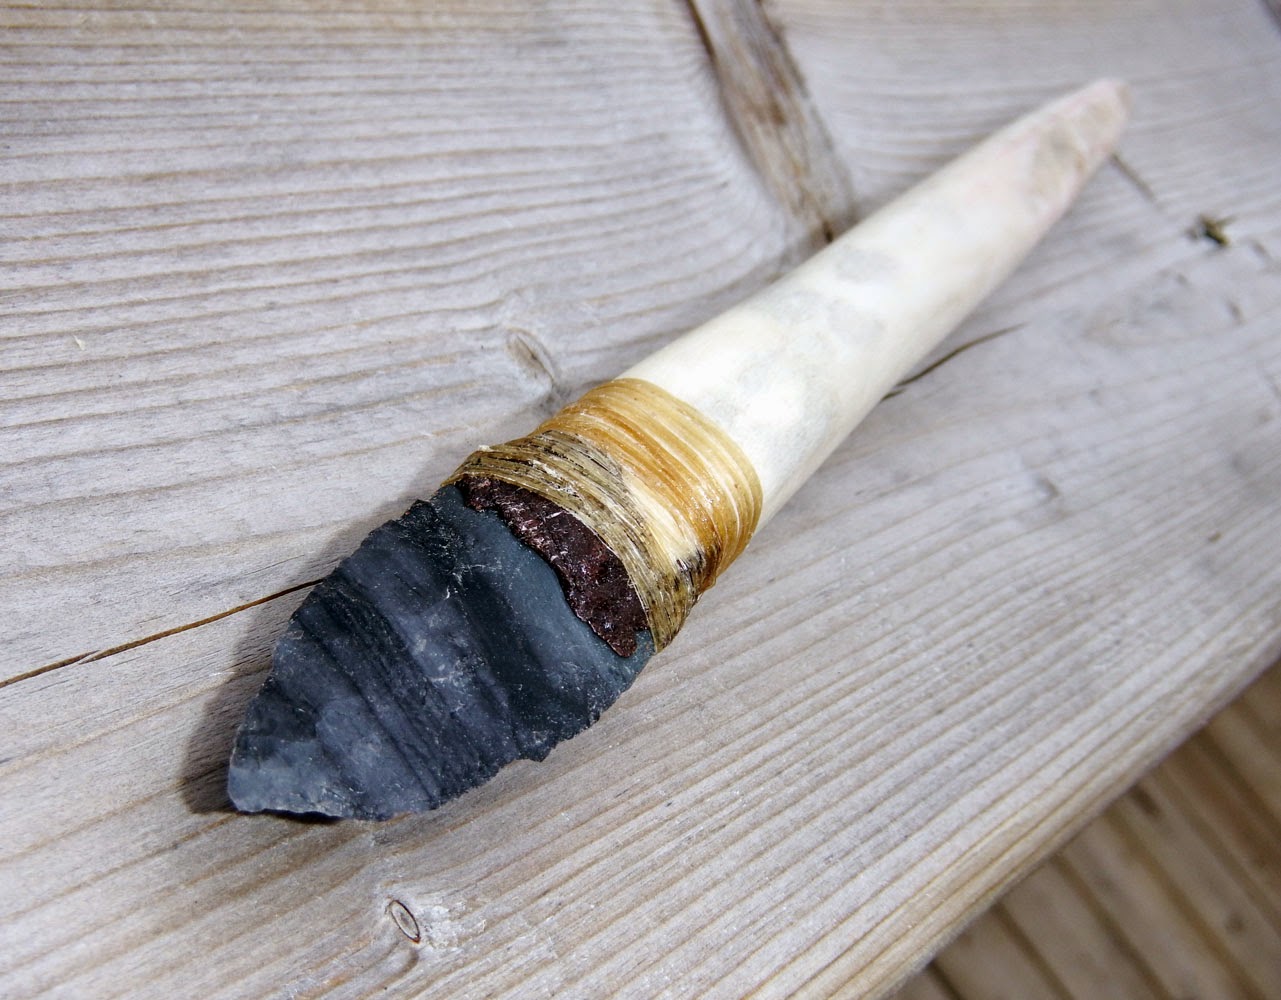
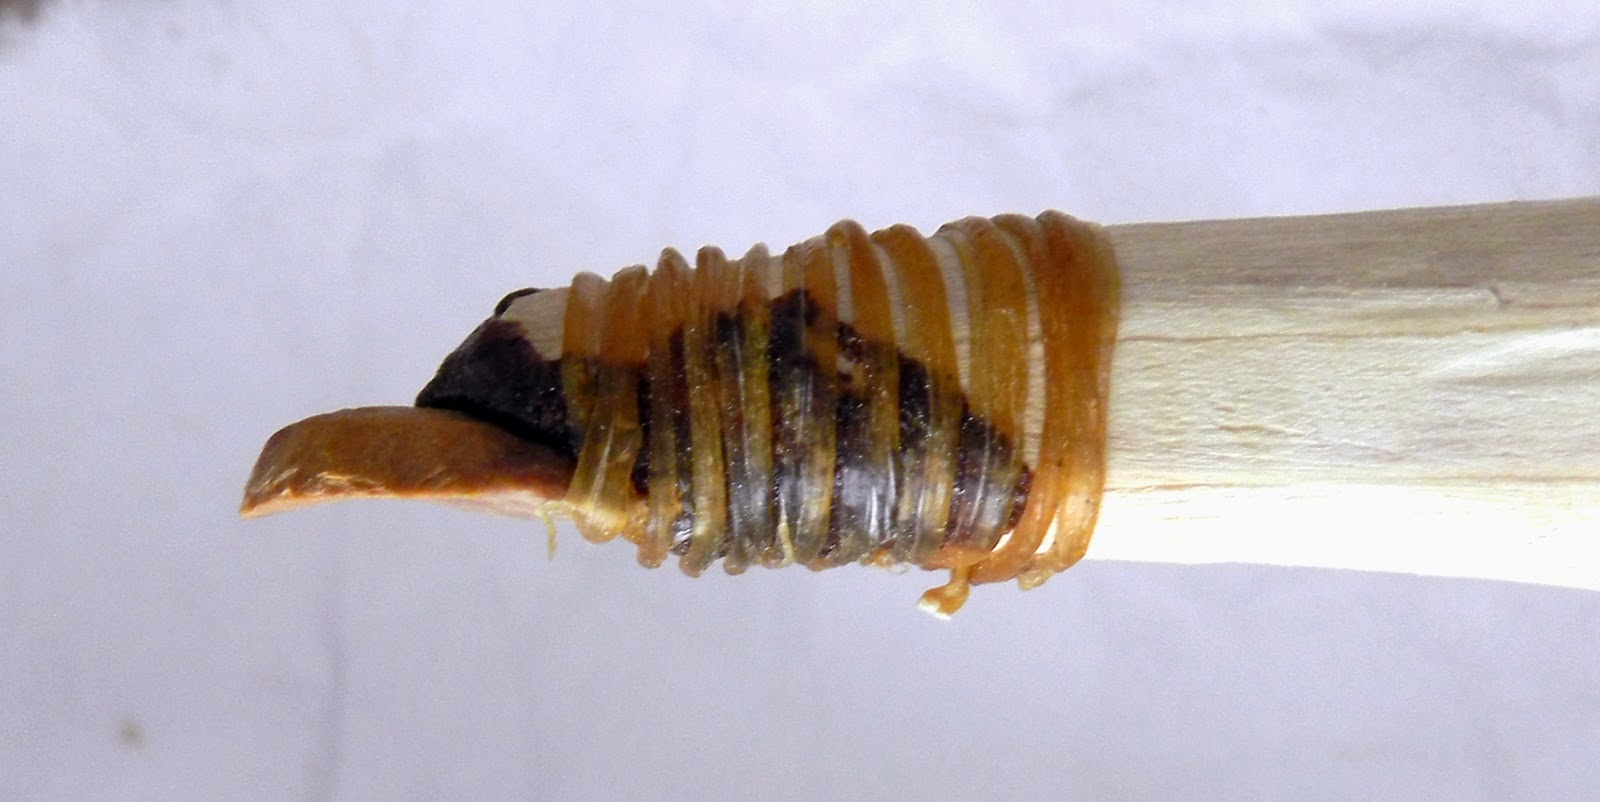
![]() |
| lashed and glued in place |
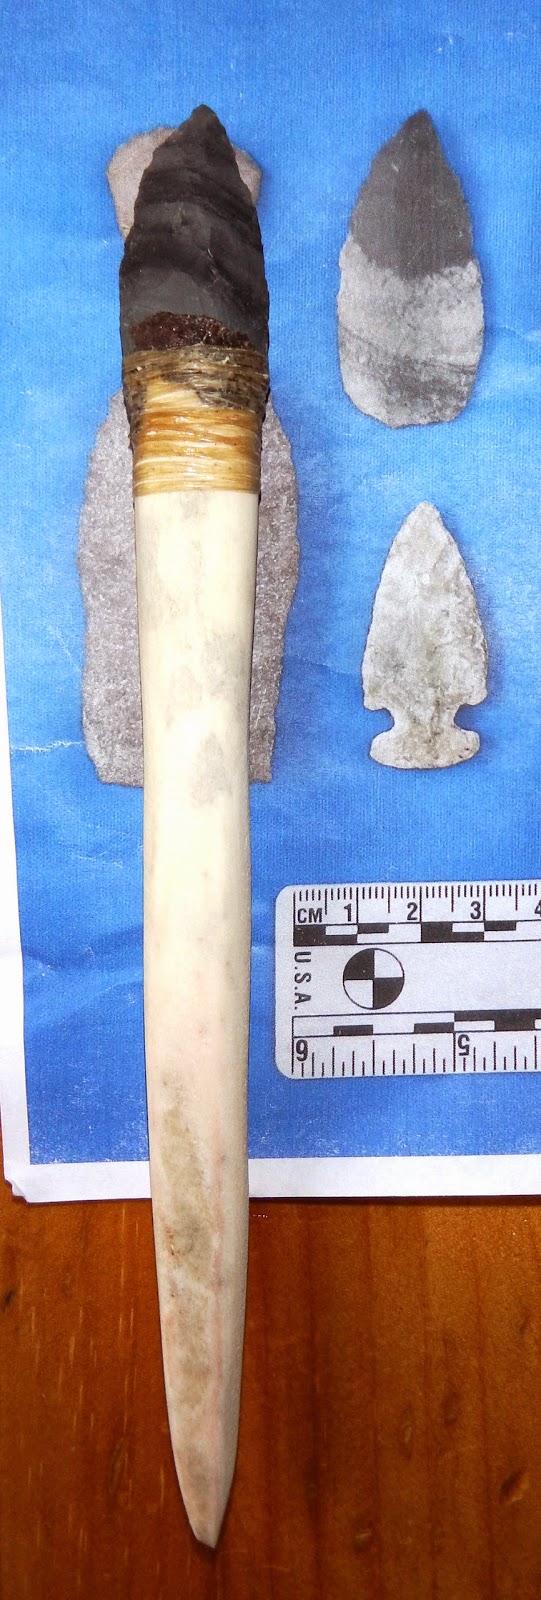
![]() |
| foreshafts with points and a projectile point read to haft |
![]() |
| Knife, scraper, arrowhead, and assorted flake tools |
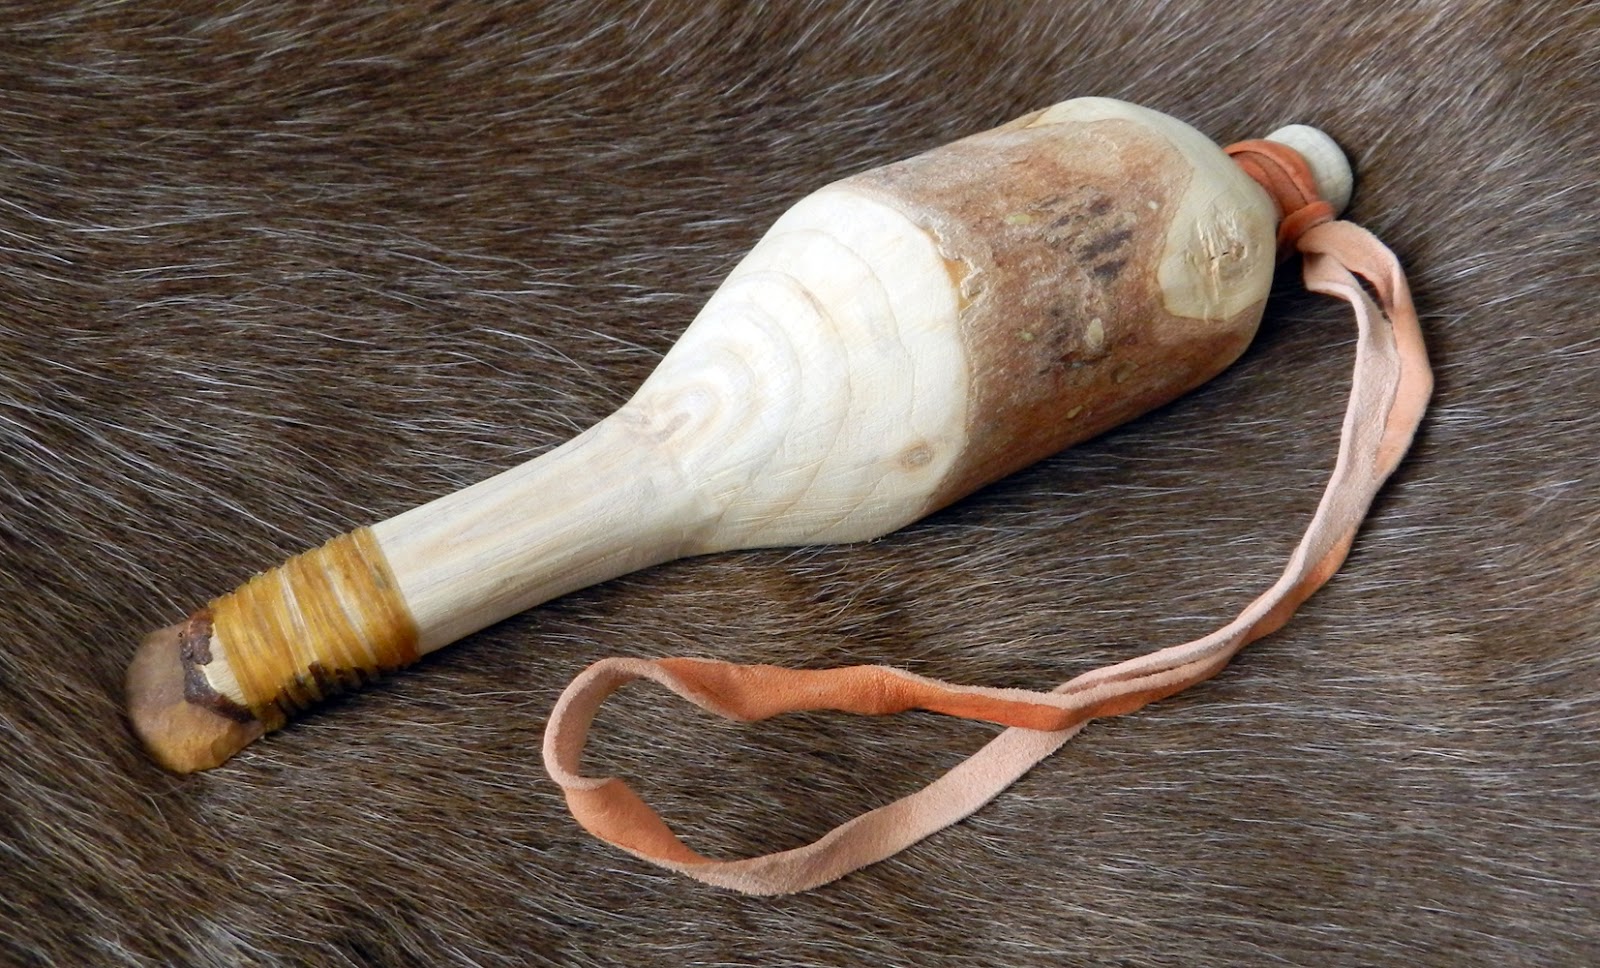
![]() |
| nice! |
![]() |
| The gluing and binding station |
![]() |
| Matt knapping a big glass slab from a wine bottle melted in the kiln |
![]() |
| Novaculite point |
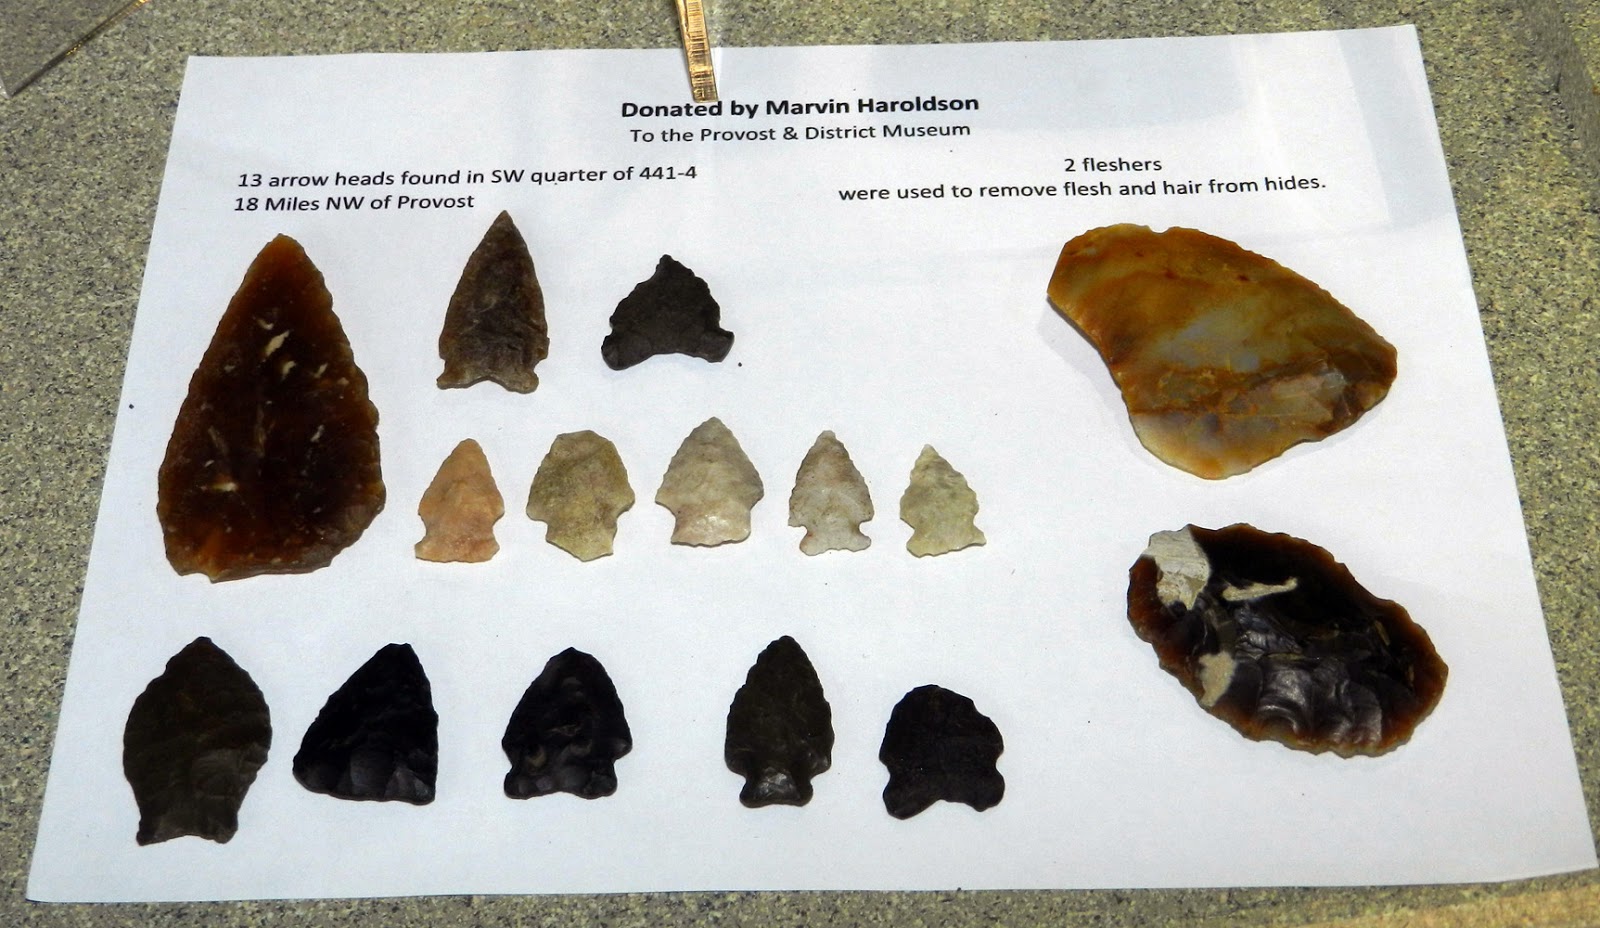
![]() |
| Points and debitage |


 The two items labeled #5 are a knife and knife handle. I used the top one as my main reference for this reproduction.